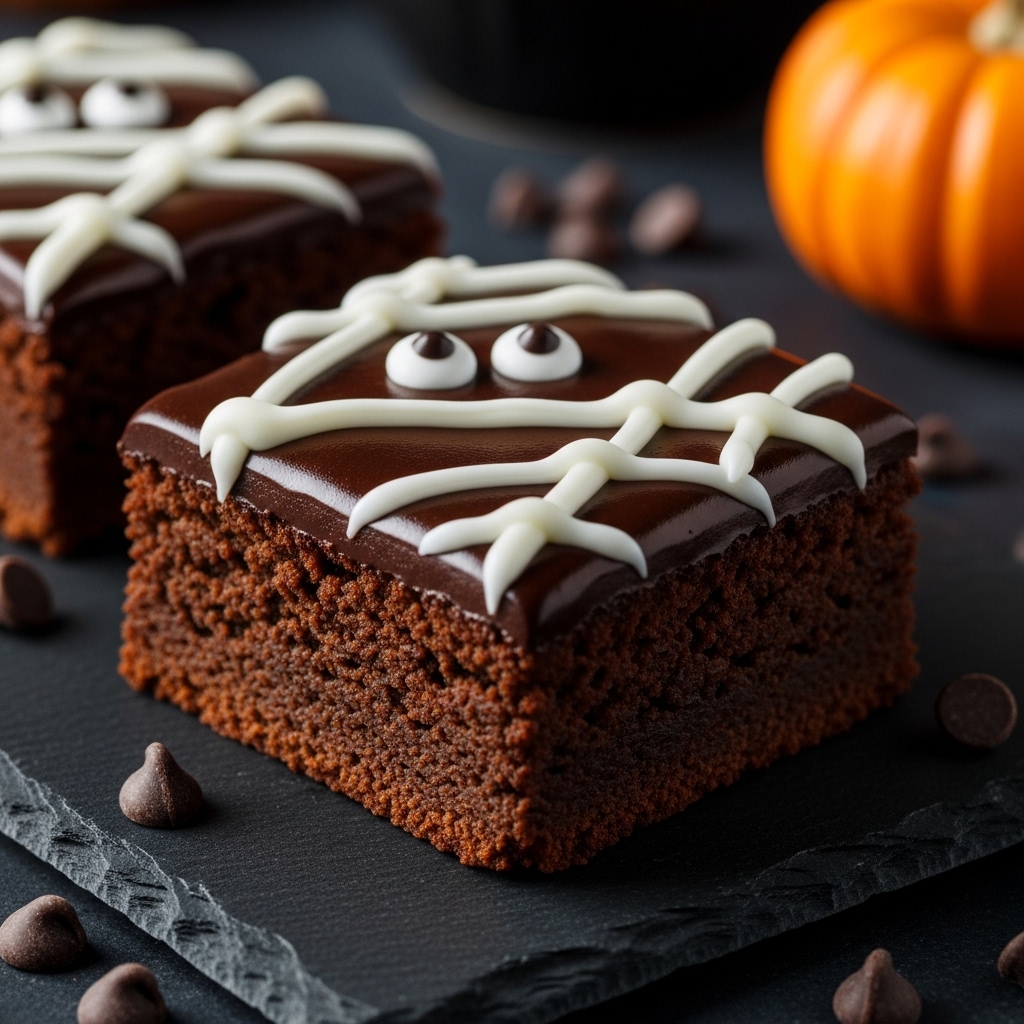
spooky mummy brownies
My Go-To Recipe for Adorable Halloween Treats (Spooky Mummy Brownies)
There’s something magical about Halloween. The air is crisp, the leaves are a kaleidoscope of colors, and the excitement of little ghosts and goblins filling the streets is palpable. One of my fondest memories is of our annual Halloween party, where I would gather friends and family for a night of spooky fun. But as the host, I often found myself juggling the demands of decorating, entertaining, and, of course, baking. I can’t tell you how many times I’ve felt overwhelmed at the thought of making treats that look incredible but don’t take hours to prepare.
Enter the Spooky Mummy Brownies! These little delights are not only irresistibly cute but also incredibly easy to make, allowing me to focus on enjoying my own party rather than being stuck in the kitchen. They’ve become my secret weapon for effortless Halloween entertaining.
Why These Are Halloween Dessert Gold
– Adorable Presentation: These brownies are so cute, they might just steal the show! Your guests will be snapping photos before they even grab a bite.
– Easy to Make: With just a few simple steps, you can whip these up without breaking a sweat, ensuring you have time to enjoy the festivities.
– Kid-Friendly Fun: The kids can help with decorating, making it a delightful family activity that adds to the holiday spirit.
– Deliciously Rich: The brownie base is fudgy and decadent, with a hint of espresso to elevate the chocolate flavor—because who doesn’t love a little caffeine boost?
I remember my friend Sarah, a mom of three who usually feels frazzled by Halloween prep, sharing how these brownies turned her “crazy chaos” into a fun family bonding moment. She said, “We had a blast decorating them together, and they tasted amazing! It was the easiest Halloween treat I’ve ever made!”
Essential Components
The secret to these spooky treats lies in their well-balanced components that work together to create a rich, indulgent dessert.
– Butter: The foundation of any good brownie, butter adds moisture and richness, ensuring your brownies are beautifully fudgy.
– Dark Chocolate Chips: Rich and intense, these provide the chocolatey base that is both satisfying and comforting—perfect for cold autumn nights.
– Sugar & Brown Sugar: The combination brings the perfect balance of sweetness and depth, which keeps each bite from being overly sugary.
– Espresso Powder: Optional, but a game-changer! Just a touch enhances the chocolate flavor, making it more complex and decadent.
– Cocoa Powder: This adds an extra layer of chocolate flavor, ensuring that every bite is pure bliss.
– Candy Eyes: The finishing touch! These whimsical little decorations transform your brownies into spooky mummies.
Note: You’ll find the complete list of ingredients, along with their exact measurements, in the printable recipe card at the bottom of this post.
Creating Mummy Brownie Magic
Ready to conjure up some spooky deliciousness? Let’s dive into the steps!
1. Preheat and Prepare
First things first, preheat your oven to 350°F (175°C) and line a 9 x 9 inch cake pan with parchment paper. Make sure it hangs over the edges; this will make removing your brownies a breeze!
2. Melt the Chocolate and Butter
In a microwave-safe bowl, combine 1 cup of dark chocolate chips and 10 tablespoons of butter. Microwave for 1 minute and then stir until it’s smooth. If it’s still a bit lumpy, give it another 20 seconds in the microwave. You want it silky and dreamy!
3. Mix It Up
Whisk in the sugars (both white and brown) until dissolved. Now, pop those eggs in a stand mixer and beat them until they’re foamy and frothy—about 2-3 minutes. With the mixer running, slowly stream in your chocolate mixture and blend until it’s smooth. If you’re using espresso powder, add it now, followed by the vanilla extract.
4. Combine the Dry Ingredients
Incorporate the flour, cocoa powder, baking powder, and salt into your chocolate mixture. Mix just until combined (no one likes tough brownies!). Then gently fold in the remaining ½ cup of chocolate chips.
5. Bake to Perfection
Spread the brownie batter evenly in your prepared pan and bake for 25-30 minutes. You’ll know they’re ready when a toothpick inserted comes out with a few moist crumbs. Allow them to cool, then cut them into squares (you can go for 9 large brownies or 12 smaller ones). For an extra touch, pop them in the freezer for about 15 minutes to firm up.
6. Time for a Chocolate Coat
In another large microwave-safe bowl, combine the semi-sweet or milk chocolate chips and 1 tablespoon of coconut oil. Heat for 1 minute and stir until smooth. If needed, warm for another 20 seconds, then let it cool for about 5 minutes.
7. Dip Those Brownies
Remove the brownies from the freezer and dip each one into the melted chocolate, using a fork to help coat it fully. Let any excess chocolate drip back into the bowl before placing them on a parchment-lined baking sheet. Chill in the fridge for another 15 minutes to set.
8. Create the Mummy Bandages
For the icing, whisk together powdered sugar with 1-2 tablespoons of heavy cream until it reaches a thick but pipeable consistency. Transfer to a ziplock bag, snip off a corner, and draw crisscross patterns on your brownies to create the mummy’s bandages. Don’t forget to attach the candy eyes!
9. Final Touches
Let the icing harden for about 10 minutes, and voila! Your Spooky Mummy Brownies are ready to be devoured!
Insights & Why It Works
What makes these brownies so special? The technique of using both melted chocolate and cocoa powder ensures that you capture the deep, rich flavor of chocolate in every bite. Plus, the combination of butter and sugars creates that perfect fudgy texture that brownies are known for.
The addition of espresso powder may seem optional, but I can’t stress enough how it elevates the chocolate flavor. It’s like a secret handshake between chocolate and coffee that brings out the best in both. Trust me; it’s worth it!
One of my biggest “aha” moments while perfecting these brownies was realizing that chilling them before dipping not only makes them easier to handle but also helps the chocolate coating set beautifully without running.
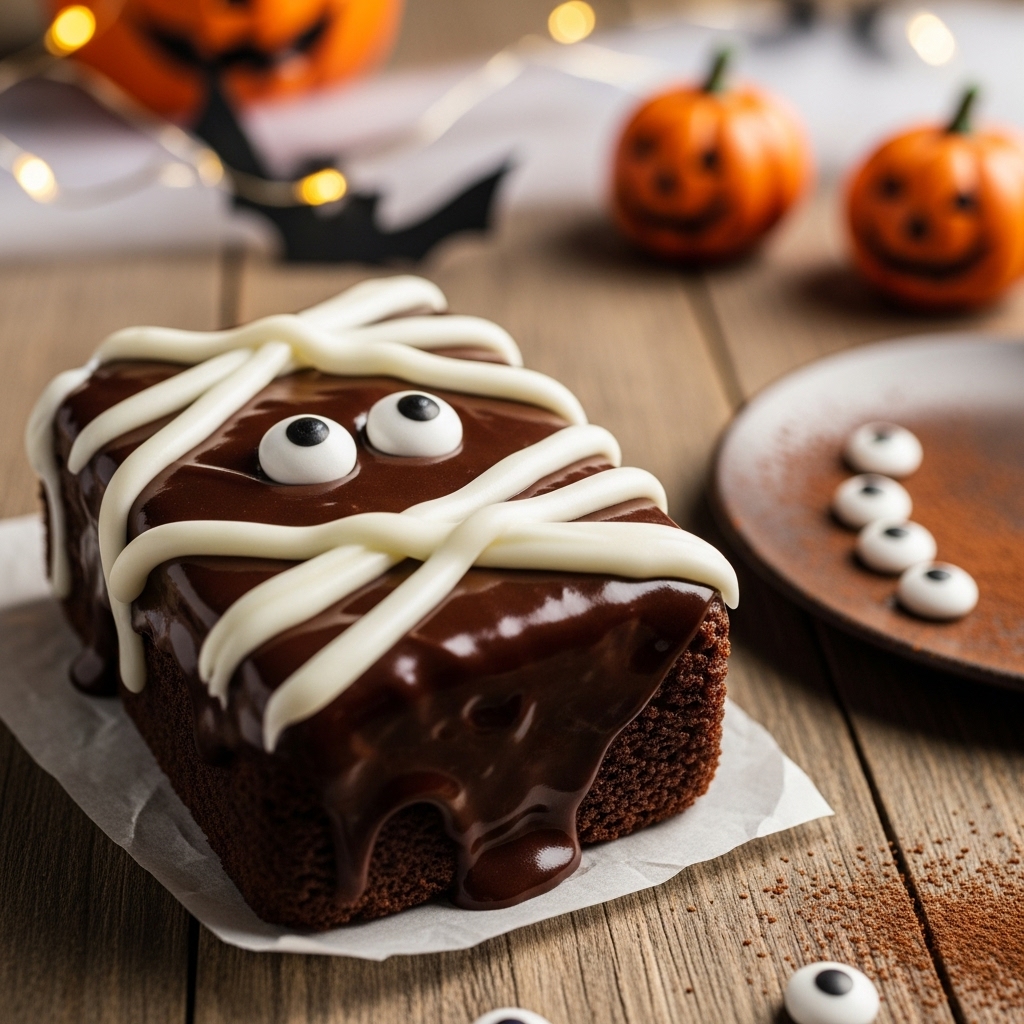
Perfect Halloween Presentation
When it comes to serving these delightful mummies, presentation is everything! I like to arrange them on a spooky platter, surrounded by mini pumpkins and some fake cobwebs for that extra festive touch. A drizzle of chocolate sauce on the platter adds elegance and a delicious touch. Pair them with a glass of warm apple cider, and you’ve got a Halloween treat table that’s sure to impress!
Creative Variations
These brownies are wonderfully adaptable! Here are a few fun variations to consider:
– Nutty Mummies: Fold in some chopped nuts, like walnuts or pecans, for an added crunch in the brownie base.
– Minty Mummies: Add some peppermint extract to the batter for a refreshing twist that pairs beautifully with chocolate.
– Spicy Mummies: Incorporate a dash of cinnamon or even cayenne pepper for a warm kick that surprises your taste buds.
– Vegan Version: Replace eggs with flax eggs and use dairy-free chocolate. You’ll still get the gooey goodness everyone loves!
– Colorful Icing: Use colored icing to make different designs and characters. How about making a mummy with a little witch hat?
Make-Ahead Magic
One of the best features of these Spooky Mummy Brownies is their make-ahead potential. You can bake the brownies up to three days in advance and store them in an airtight container. Just hold off on the chocolate coating and decorations until the day of your gathering for that freshly dipped look. This strategy gives you one less thing to worry about on the day of your Halloween party!
Brownie Success Tips
– Do Not Overmix: When adding the dry ingredients, mix just until combined to keep your brownies fudgy.
– Chill for Easy Dipping: Freezing the brownies before dipping them in chocolate makes them easier to handle.
– Let the Chocolate Set: Allow the chocolate coating to harden in the fridge for that perfect shiny finish.
– Be Generous with Icing: Don’t be shy with the icing; it adds character to your mummies!
Final Thoughts
Looking back on my past Halloween gatherings, I can’t help but smile knowing I’ve finally found a way to make delightful treats without the stress. These Spooky Mummy Brownies allow me to enjoy the festivities, see the joy on my guests’ faces, and even have a little fun with the kids in the kitchen. They’re not just a dessert; they’re a way to bring everyone together and celebrate the season in the most delicious way. So, go ahead, whip up a batch, and let the Halloween magic unfold!
Frequently Asked Questions
Can I make these the night before?
Absolutely! Bake the brownies and store them in an airtight container without the chocolate coating. Coat them the next day for the freshest taste.
How do I prevent the brownies from being too cakey?
Be careful not to overmix the batter once you add the dry ingredients, and check them in the oven a few minutes early. You want that fudgy texture!
Can I use different chocolate?
Yes! Feel free to swap in milk chocolate or even white chocolate for coating. Just keep in mind that the flavors will change slightly.
What’s the difference between cocoa powder and dark chocolate?
Cocoa powder is unsweetened and adds a deep chocolate flavor, while dark chocolate is sweetened and contributes to the richness of the brownies.
Can I use a different type of icing?
Of course! You can use store-bought icing or even melted white chocolate to create your mummy bandages. Just have fun with it!