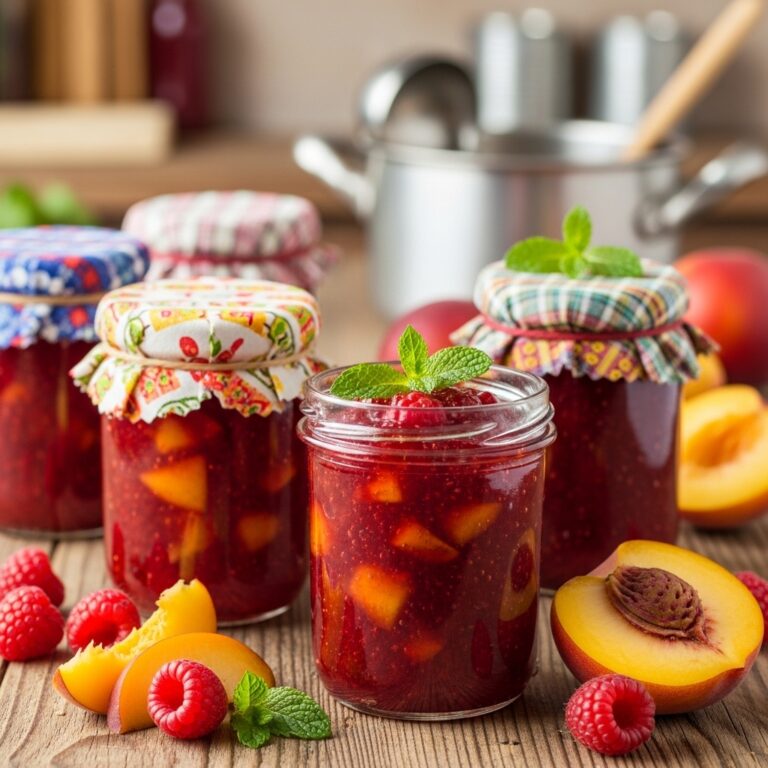
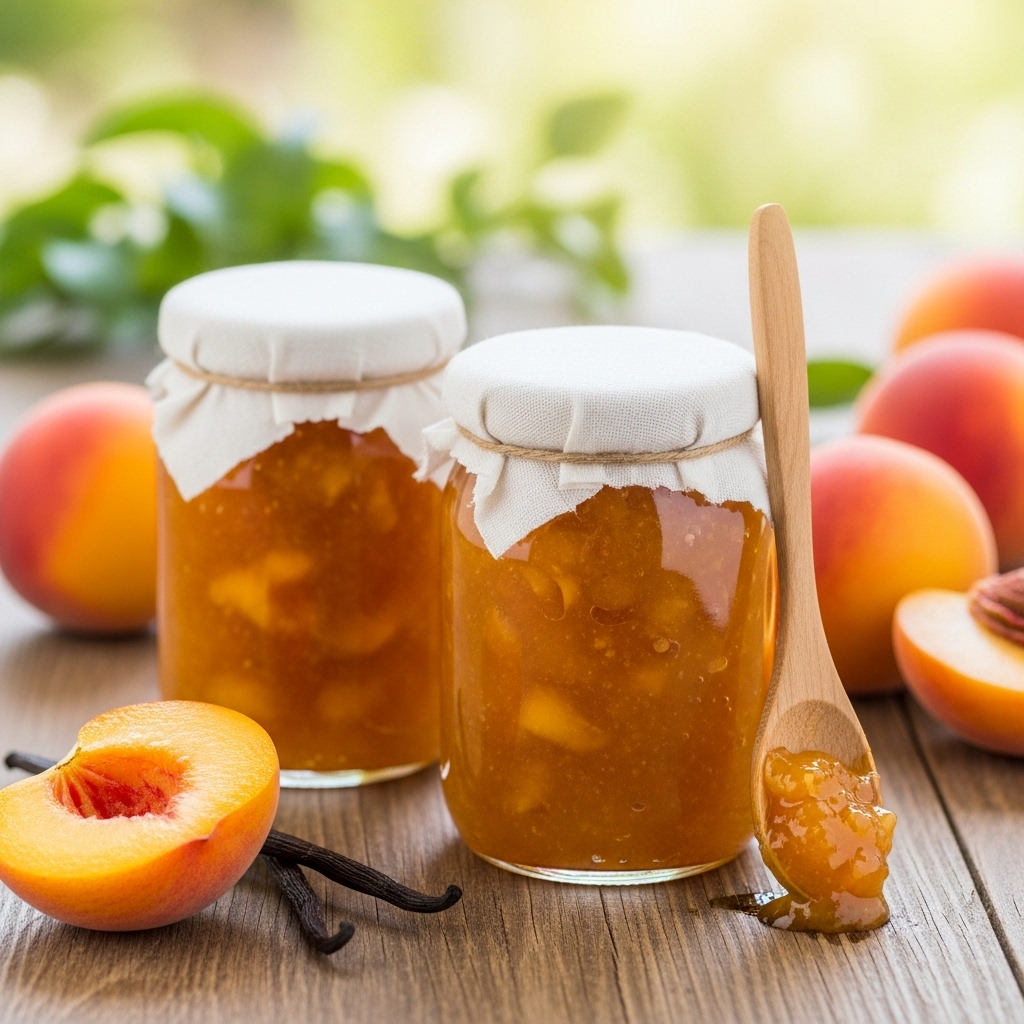
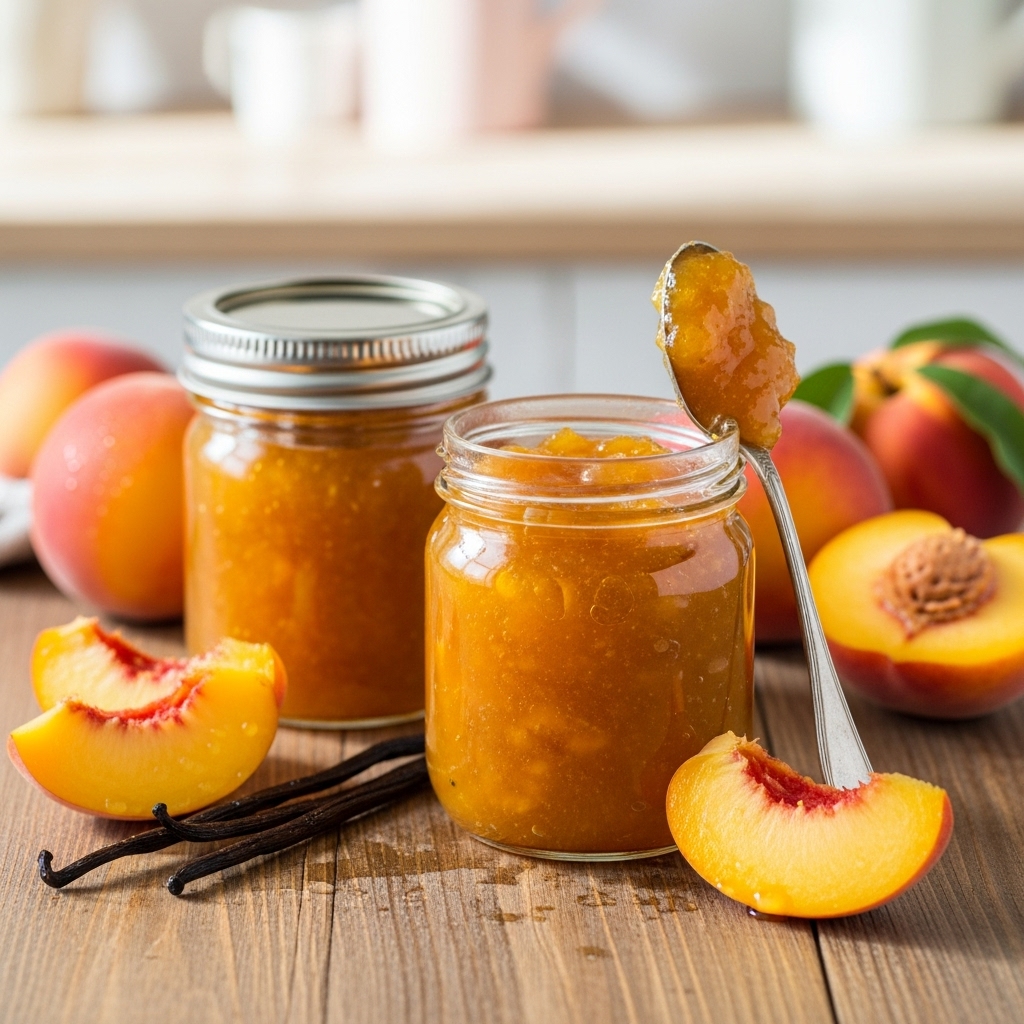
Small Batch Vanilla Peach Jam
Peachy Dreams in a Jar: Small Batch Vanilla Peach Jam
Ever just stand in the kitchen, staring at a pile of ripe peaches, and think, “What the heck am I gonna do with all these?” Yeah, that was me last summer. I was swimming in peaches and had to make somethin’ happen!
Okay, so… let’s talk ingredients.
Okay, Let’s Talk Ingredients
You’re gonna need:
– 3 pounds of peaches (that’s about 12, and trust me, they need to be juicy and ripe—like “I can’t even” kind of ripe).
– 1 cup of sugar (or more if you’re feeling wild? But seriously, keep it at a cup).
– 2 teaspoons of vanilla extract (the good stuff, please. Not the fake stuff that smells like a cake disaster waiting to happen).
I always end up buying way too many peaches—like, who can resist? They start looking at me in the store, begging to come home, and I’m just like, “Okay, fine! Let’s do this!”
So Here’s Why I Make This Constantly
So, last summer, I had this peach overload. I mean, I was practically tripping over them. I thought, “Jam it is!” I whipped this up one rainy afternoon when I was feeling all cozy and “let’s make something delicious” vibes. I still remember how the kitchen smelled—sweet, sticky, like a peach paradise. I had a couple of friends over, and by the time we were done, we were all just shoveling it on toast like there was no tomorrow. It was like a jam party! 😂
The One Trick That Changes Everything
Okay, listen up—this is the golden nugget: Don’t rush the cooking! Let those peaches break down slowly. I usually get distracted, staring out the window, but if you let that jam simmer and get all thick and gooey, it’s like a hug in a jar. Seriously, don’t just stir and walk away… you gotta give it some love!
Don’t Mess This Up (My Top Tips)
– Stir often! Like, every 20 minutes? No, more like every 10 when it starts thickening. Don’t let it stick to the bottom! I learned that the hard way. *Burnt peach jam is NOT cute.*
– Taste! Always taste! If it’s too sweet, you can add a squeeze of lemon juice.
– Clean those jars! Seriously. Clean rim = good seal. If you don’t wipe it, you’ll regret it when it doesn’t seal, and then you’re stuck eating all that jam yourself (not a bad fate honestly, but still).
How to Keep Them From Disappearing (Or, How to Store Them)
Once cooled, pop those jars in the fridge. They’ll last up to six months! But let’s be real. It’ll probably be gone in a week if you’re anything like me. I’ll start with toast, then end up eating it straight from the jar with a spoon. No shame! 🍑
If You Liked This, You’ll Probably Like These Too
– Strawberry Basil Jam: If you’re into berry vibes, this is fab!
– Blueberry Lemon Curd: So tangy and sweet—perfect on pancakes!
– Homemade Nutella: Because we all need a chocolate break sometimes, right?
So, what’s your go-to way of using jam? Toast, yogurt, or just straight-up spoon action? Let’s hear it! 🍯✨
Small Batch Vanilla Peach Jam
Flavor-packed Small Batch Vanilla Peach Jam with amazing ingredients and incredible taste! Perfect for any occasion.
20 minutes
120 minutes
140 minutes
Ingredients
- 3 pounds peaches, (about 12 peaches, pit removed, peach flesh finely chopped)
Instructions
- Add the peaches and the sugar to a medium-sized, deep saucepan and turn the heat to medium until the mixture begins to bubble.
- Then, reduce the heat to simmer and stir. Allow the mixture to cook and the fruit to naturally break down. Be sure to stir every 20 minutes or so, even more frequently when the jam begins to thicken.
- When the jam has reached the consistency you desire, remove the saucepan from the heat and add the vanilla extract.
- Stir well to combine and then carefully pour the hot jam into clean and sterile mason jars.
- Be sure the rim of the jar is clean and jam-free, wipe the lid with a damp cloth, place on the seal and tighten the lid until a slight resistance is met.
- Carefully place the jar on a kitchen towel where the jar will not be disturbed for twelve hours.
- Once the jam begins to cool, the seal will create a popping sound, assuring you that the jar is sealed.
- Refrigerate for immediate use. Once sealed, jam will keep refrigerated for up to six months.