Pumpkin Cheese Ball
The Ultimate Fall Festivity Starter (Pumpkin Shaped Cheese Ball)
As the leaves transform into a kaleidoscope of reds, oranges, and yellows, I can’t help but get giddy over the arrival of fall. This time of year always reminds me of that magical October when my best friend, Emily, decided to throw her first-ever Halloween bash. I remember standing in her kitchen, a whirlwind of orange decorations and the sweet scent of cinnamon wafting through the air, when she turned to me with a mix of excitement and panic. “What on earth am I going to serve? I haven’t a clue!”
It was in that moment of mild chaos that I introduced her to my secret weapon: the Pumpkin Shaped Cheese Ball. Not only does it capture the essence of the season with its playful pumpkin shape, but it also serves as a delightful centerpiece that’s easy to whip up. It’s the perfect answer to the age-old hosting dilemma: how to create a festive, crowd-pleasing appetizer that allows you to mingle instead of being tethered to the kitchen.
Why This is Cheese Ball Gold
Let me tell you why this pumpkin-shaped cheese ball will be your go-to appetizer for fall gatherings and beyond:
– Simple & Quick: With just 15 minutes of prep, you’ll have a festive centerpiece ready to chill while you focus on other party details.
– Make-Ahead Magic: Prep it a day in advance to alleviate stress on the big day.
– Crowd-Pleasing Flavor: The combination of cream cheese, chive & onion spread, and sharp cheddar creates a flavor explosion that guests can’t resist.
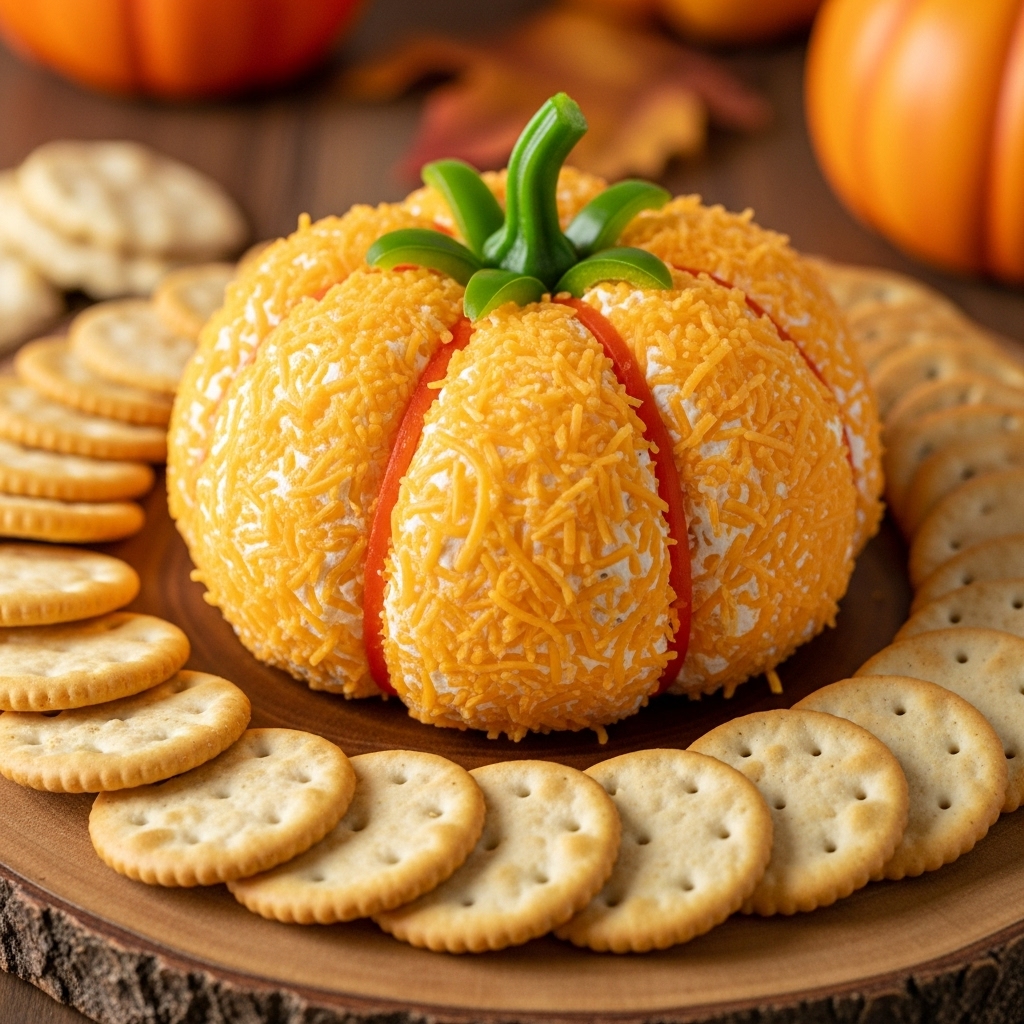
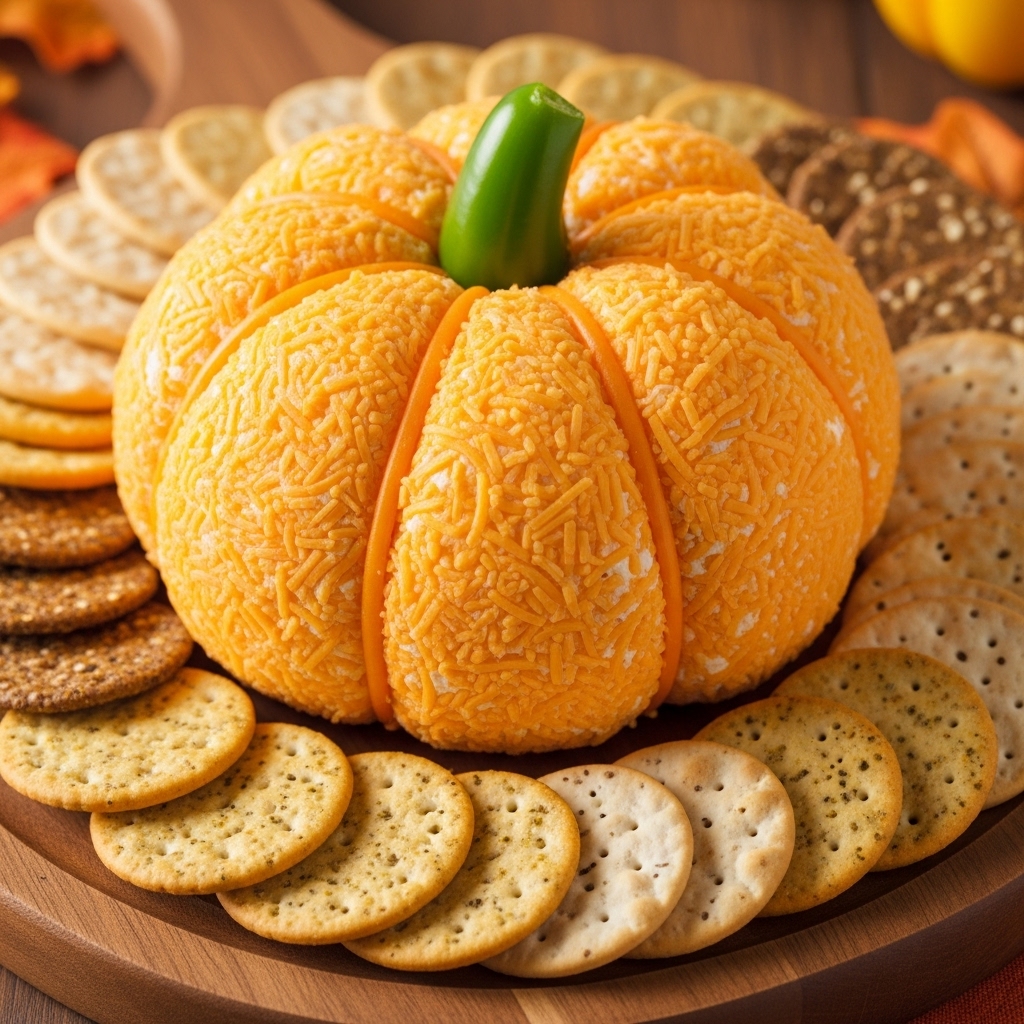
– Visually Stunning: Shaped like a pumpkin and topped with a bell pepper stem, it’s a fun conversation starter that’s bound to impress!
Just the other day, as I shared this recipe with Emily (now a seasoned hostess), she remarked, “I can’t believe how easy this is! It’s become my signature dish!” That glowing testimonial is all the proof you need.
Essential Components
This cheese ball is all about the blend of flavors and textures, and each ingredient plays a crucial role:
– 8 oz Cream Cheese: The creamy base gives the cheese ball its rich texture and acts as the perfect canvas for flavor.
– 7.5 oz Chive & Onion Cream Cheese Spread: This adds an herby punch that brings the whole dish to life, taking it from simple to sensational.
– ¼ teaspoon Salt, Pepper, and Garlic Powder: These seasonings are key in enhancing the overall taste, ensuring every bite is packed with savory goodness.
– 8 oz Sharp Cheddar Cheese (freshly grated): The sharpness of this cheese balances the creaminess, providing a delightful contrast that keeps your taste buds excited.
– Bell Pepper Stem: Not just for decoration, this little detail elevates your cheese ball from ordinary to Instagram-worthy!
Note: You’ll find the complete list of ingredients, along with their exact measurements, in the printable recipe card at the bottom of this post.
Creating Cheese Ball Magic
Ready to impress your guests? Let’s dive into the step-by-step process of crafting this delightful pumpkin cheese ball!
1. Mix the Creamy Base: In a mixing bowl, beat together the softened cream cheese, chive & onion spread, salt, pepper, garlic powder, and 1 ¼ cups of the shredded sharp cheddar cheese until fully combined. The blend should be creamy, with a hint of that onion-y goodness.
2. Prepare for Shaping: Lay out a double layer of cling wrap on your counter – make sure it’s long enough to wrap your cheese ball tightly.
3. Sprinkle Some Cheesy Goodness: Pour ⅓ cup of the remaining cheese onto the cling wrap where the bottom of the cheese ball will sit. This will create a delicious crust that adds texture to the finished product.
4. Shape the Cheese Ball: Spoon the cheese mixture over the cheese bed and then use the remaining shredded cheese to cover the top and sides. Don’t be shy – this is where it gets cheesy!
5. Wrap Up: Gather the cling wrap around the cheese ball and use your hands to mold it into a round shape. Make sure it’s tightly wrapped for the best results.
6. Pumpkin Time: Grab thick rubber bands and double wrap them around the cheese ball to create that adorable pumpkin shape. Just like making a holiday wreath, be sure to space them evenly for the best effect!
7. Chill Out: Place your wrapped cheese ball in the fridge for at least 2 hours. By the time it’s ready to serve, you’ll have a perfectly formed pumpkin that’s as delicious as it is cute.
8. Add the Finishing Touch: Carefully remove the rubber bands and unwrap the cling film. Top your pumpkin cheese ball with a bell pepper stem and serve with your favorite crackers.
Insights & Why It Works
What makes this pumpkin cheese ball such a showstopper goes beyond its adorable shape. The synergy of creamy and sharp flavors creates an irresistible dip that’s hard to resist, and the cheese ball format makes it incredibly shareable. I’ve learned that the key to a perfect cheese ball is using freshly grated cheese rather than pre-packaged varieties. Freshly grated cheese melts and binds better, resulting in a creamier consistency that your guests will love!
One of those “aha!” moments for me was realizing that a little planning goes a long way. Prepping this cheese ball the night before not only cuts down on day-of stress but also allows the flavors to meld beautifully, enhancing that delicious taste.
And don’t forget about the advantage of its presentation! In a sea of traditional appetizers, this pumpkin cheese ball catches the eye and sparks conversations, making it the ideal starter for any gathering.
Perfect Fall Presentation
When it comes to serving, pair your pumpkin cheese ball with an array of crunchy crackers, fresh vegetable sticks, and maybe even some apple slices for a sweet contrast. A platter adorned with fall leaves or mini pumpkins will encapsulate the seasonal spirit, making the cheese ball the star of the show.
Creative Variations
This recipe is as versatile as it is festive! Here are a few variations to switch it up:
– Herb Infusion: Add a tablespoon of fresh herbs like dill or parsley for an extra burst of flavor.
– Spicy Kick: Incorporate finely chopped jalapeños or a splash of hot sauce for a spicy twist.
– Sweet Surprise: Mix in some finely chopped dried cranberries or apricots for a sweet-savory combo.
– Nutty Crunch: Roll the exterior in crushed nuts for an added texture and flavor boost.
– Cheese Lovers’ Delight: Swap out the cheddar for your favorite cheese varieties, like gouda or pepper jack, for a fun flavor twist.
Make-Ahead Magic
One of the best parts of this cheese ball is its make-ahead convenience. You can easily whip it up a day in advance. Just follow the recipe, wrap it in cling wrap, and store it in the fridge. On the day of your gathering, simply remove it from the fridge, let it sit at room temperature for a few minutes, and voilà! You’re ready to serve a show-stopping appetizer without the last-minute stress.
Cheese Ball Success Tips
– Use Fresh Ingredients: Freshly grated cheese and high-quality cream cheese yield the best flavor and texture.
– Don’t Rush the Chilling: Allowing the cheese ball to chill for at least 2 hours is essential for it to hold its shape.
– Wrap Tightly: When molding, make sure to press firmly to create a solid ball shape and avoid any air pockets.
Final Thoughts
Reflecting back on that chaotic October evening with Emily, I couldn’t have imagined how a simple cheese ball could transform a night of anxiety into one filled with laughter and delicious bites. This pumpkin cheese ball not only makes you look like a hosting pro but allows you to enjoy the festivities without stress. So, grab the ingredients, channel your inner fall spirit, and whip up this delightful appetizer. Trust me, your friends will thank you!
Frequently Asked Questions
Can I make this cheese ball the night before?
Absolutely! In fact, making it a day in advance allows the flavors to meld beautifully.
How do I prevent the cheese ball from falling apart?
Ensure you let it chill for a minimum of 2 hours. This firms up the cheese ball and helps it hold its shape.
Can I use different types of cheese?
Yes! While sharp cheddar is fantastic, feel free to experiment with other cheeses you love, like gouda or pepper jack.
What can I serve with this cheese ball?
This cheese ball pairs wonderfully with assorted crackers, veggie sticks, and even fruit slices for a sweet contrast.
How do I store leftovers?
Wrap any leftovers tightly in cling wrap and store them in the refrigerator for up to 3 days. Enjoy cold or bring to room temperature before serving!