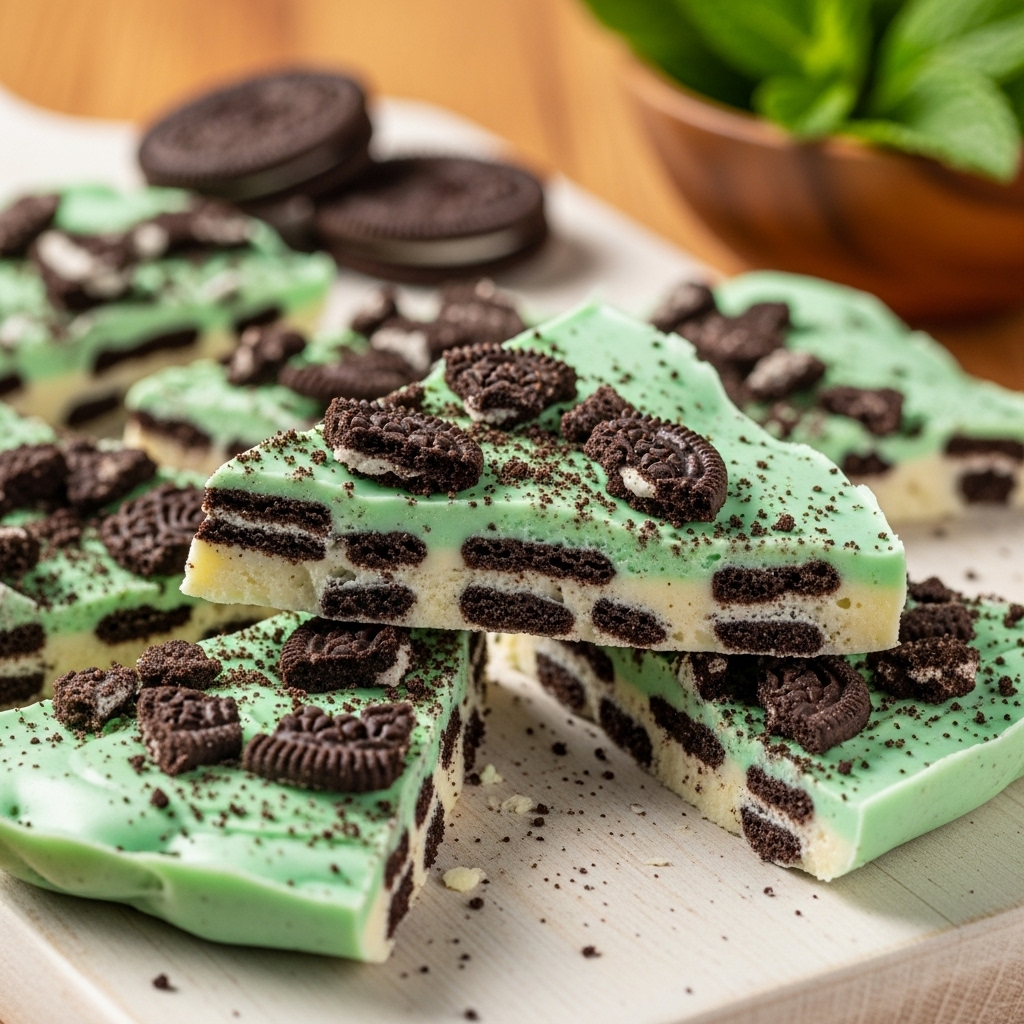
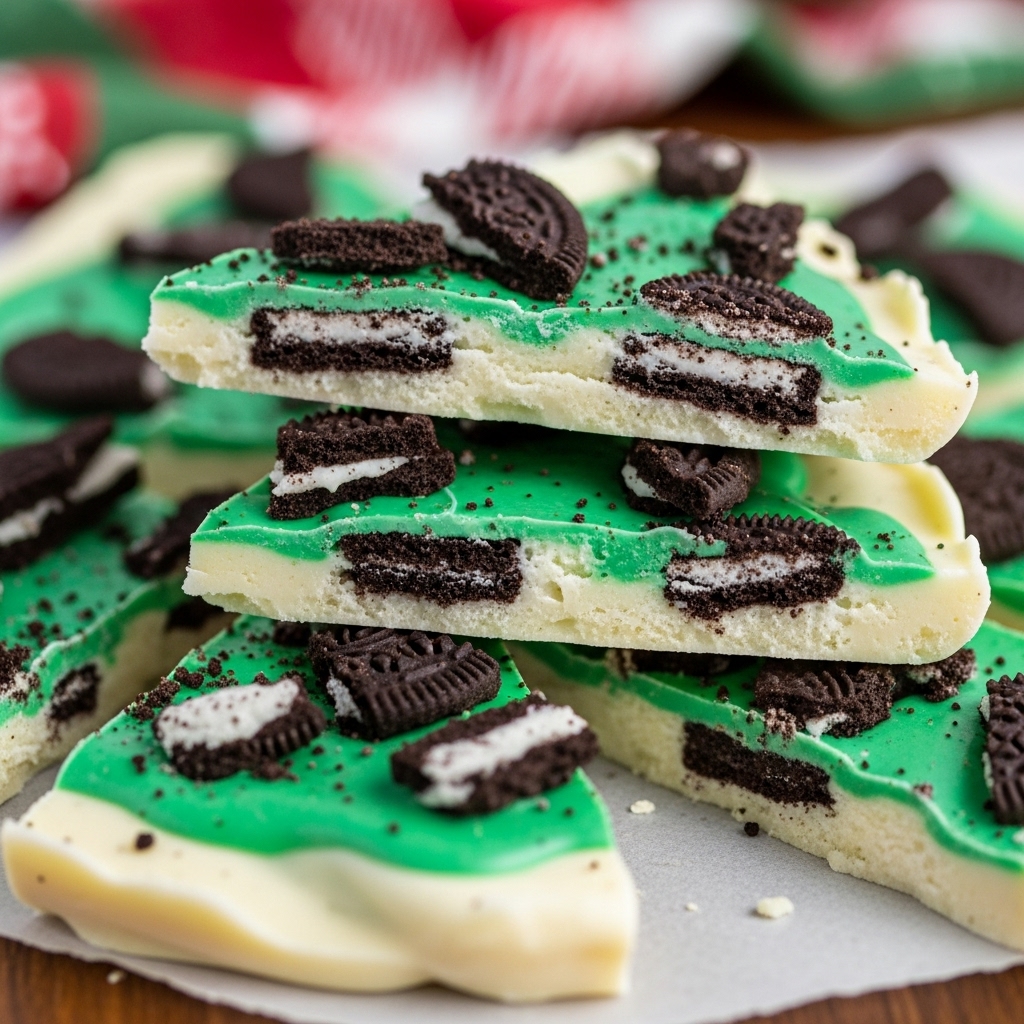
Mint Oreo Bark
The Ultimate Holiday Treat That Will Disappear in Minutes (Mint Oreo Bark)
There’s a special magic that happens during the holiday season, isn’t there? The air is crisp, and the days are filled with laughter, twinkling lights, and the delightful aroma of festive treats. I remember one particular December when my husband, Ryan, and I hosted our annual holiday gathering. The kitchen was buzzing with the sounds of clanking pots, and the scent of cinnamon and nutmeg wafted around us. I had planned a fabulous spread of savory dishes, but as the guests arrived, I panicked. I realized I had forgotten dessert! I needed something simple yet spectacular that could satisfy our sweet tooth and impress our friends. Enter my secret weapon: Mint Oreo Bark.
This no-bake wonder not only saved the day but became the highlight of our dessert table. With minimal effort and just four ingredients, I transformed ordinary Oreos into a creamy, minty delight that vanished faster than a holiday wish.
Why This Mint Oreo Bark Is Dessert Gold
Let’s be honest: the holidays can get overwhelming. Between decorating, shopping, and entertaining, who has time to whip up a complicated dessert? That’s where Mint Oreo Bark shines.
– Quick and Easy: In just 10 minutes, you can create a crowd-pleaser. All you need is a microwave and a mixing bowl.
– No Baking Required: No oven needed means no stress—just melt, mix, and chill!
– Customizable Flavor: Adjust the mintiness to your liking—add more or less mint extract based on your taste buds.
– Beautiful Presentation: The vibrant green hue and white chocolate make for a stunning holiday treat that looks as good as it tastes.
– Perfect for Sharing: With about 30 pieces, it’s the ideal party dessert that keeps everyone happy and satisfied.
Just the other day, my friend Jenny texted me saying, “I made your Mint Oreo Bark for my office party, and everyone was raving about it! I felt like a baking superstar!” It’s true—this recipe elevates your dessert game and earns you all the compliments!
Essential Components
Creating Mint Oreo Bark is delightful in its simplicity, but each ingredient plays a vital role in achieving that dreamy flavor and texture.
– Regular Oreos: The classic chocolate cookie provides a crunchy contrast to the smooth white chocolate.
– White Chocolate Morsels: Creamy and sweet, they form the luscious base that perfectly complements the mint.
– Mint Extract: This is the star of the show! Just a few drops add a refreshing kick; you can adjust to your taste.
– Green Food Coloring: A few drops not only make the bark festive but also visually appealing—it’s like a winter wonderland on a plate!
Note: You’ll find the complete list of ingredients, along with their exact measurements, in the printable recipe card at the bottom of this post.
Creating Mint Oreo Bark Magic
Ready to whip up this easy, no-bake dessert? Let’s dive into the steps that will have everyone asking for your secret recipe!
1. Break the Oreos: Begin by placing the Oreos in a mixing bowl. Use your hands or a rolling pin to gently break them into large chunks. You want some texture, so don’t overdo it—those bits of cookie will add delightful crunch!
2. Melt the Morsels: In a microwave-safe bowl, melt the white chocolate morsels according to the package instructions. Check every 30 seconds and stir until smooth and shiny. This is where the magic begins!
3. Add Mint and Color: Once melted, quickly stir in the mint extract and a few drops of green food coloring. The aroma is heavenly! Mix until the color is uniform. Remember, you can always start with a little and add more mint if you prefer a stronger flavor.
4. Stir in the Oreos: Gently fold the Oreo chunks into the melted chocolate mixture, ensuring each piece gets coated in that creamy goodness. It’s like a party in a bowl!
5. Pour and Chill: Line a pan with wax paper and pour the mixture into it. Spread it evenly with a spatula. Now, pop it into the freezer for about two hours. Patience is key—this is where it firms up into that delicious bark.
6. Break and Enjoy: Once set, take it out and break it into pieces. Feel free to use your hands or a sharp knife. Serve it on a festive platter and watch it disappear!
Insights & Why It Works
Now that you’ve mastered the basics of Mint Oreo Bark, let’s reflect on why this recipe is a game-changer in the dessert world. The simplicity of the no-bake method is a dream come true for busy hosts. You don’t have to juggle oven space or complicated techniques; it’s all about melting and mixing, making it accessible to anyone, regardless of their culinary skills.
The white chocolate offers a wonderful canvas for the addition of mint and the Oreos lend a nostalgic flavor that many of us associate with childhood treats. This combination not only elevates the taste but also evokes fond memories of simpler times—a real win-win!
As I perfected this recipe over the years, I learned that the key is finding the right balance of mint. Too much can be overwhelming, while too little just leaves you wanting more. My ‘aha!’ moment was realizing that the green food coloring isn’t just for looks; it sets the festive tone and adds a touch of whimsy that’s perfect for holiday gatherings.
Perfect Holiday Presentation
Serving Mint Oreo Bark is as easy as making it! For an extra special touch, consider drizzling some melted chocolate over the top before chilling. You can also sprinkle crushed candy canes or festive sprinkles for that holiday sparkle.
Pair it with a warm cup of cocoa or some homemade eggnog, and you’ve got a dessert that feels like a cozy hug. Your guests will love it, and you’ll look effortlessly organized!
Creative Variations
This Mint Oreo Bark recipe is so adaptable! Here are a few fun twists to keep the excitement alive:
– Chocolate Oreo Bark: Swap the white morsels for dark chocolate for a richer flavor.
– Add Nuts: Toss in some chopped almonds or walnuts for an extra crunch.
– Flavor Infusions: Experiment with different extract flavors like vanilla or almond for a unique taste.
– Holiday Sprinkles: Use colored sprinkles or edible glitter to match your party theme.
– Layered Bark: Create layers by alternating between white and dark chocolate for a dramatic effect.
Make-Ahead Magic
One of the best parts about Mint Oreo Bark is how easy it is to prepare in advance. You can make it up to a week ahead of time! Simply follow the instructions and once set, store the bark in an airtight container in the fridge. This not only saves you time on the day of your gathering but also allows those delicious flavors to meld together, creating an even tastier treat!
Mint Oreo Bark Success Tips
– Don’t Overheat the Chocolate: Stir frequently while melting to avoid scorching. You want it smooth and glossy!
– Chunk Size Matters: Keep Oreo pieces substantial for texture; small crumbs can get lost in the chocolate.
– Chill Completely: Make sure the bark is fully set before breaking it apart; this ensures clean edges.
– Storage: Keep leftovers in an airtight container to maintain freshness and flavor.
Final Thoughts
Reflecting on that chaotic holiday gathering, I’m forever grateful for my Mint Oreo Bark. It transformed what could have been a dessert disaster into a sweet triumph, all while allowing me to enjoy the company of friends and family. The ease of preparation and the joy of sharing a beloved treat with loved ones perfectly encapsulates the spirit of the season.
So, as you gear up for your own festivities, remember this simple yet glorious recipe. With Mint Oreo Bark in your arsenal, you’ll not only look like the ultimate host but also create lasting memories with every delicious piece. Happy baking—and even happier sharing!
Frequently Asked Questions
Can I make these the night before?
Absolutely! Mint Oreo Bark stores beautifully in the fridge for up to a week, making it perfect for advance prep.
How do I prevent the chocolate from seizing?
Make sure your bowl and utensils are completely dry, and stir frequently while melting to avoid overheating.
Can I use different cookies?
Definitely! Feel free to swap Oreos for any of your favorite cookies—just keep in mind that the flavor will change!
What’s the difference between white chocolate and white chocolate chips?
White chocolate chips often have stabilizers to hold their shape, while white chocolate melts smoothly. For this recipe, either works, but for a creamier texture, I recommend using regular white chocolate.
Can I use a different extract?
Yes! You can get creative with almond or vanilla extract for a different flavor profile. Just remember to adjust the amount according to your taste preference!