Marshmallow Rice Bubbles Halloween Brains
My Go-To Treat for Halloween Fun (No-Bake Marshmallow Rice Bubbles Brains)
As Halloween rolls around each year, I find myself caught in a delightful whirlwind of spooky decorations, costume planning, and, of course, brainstorming creative treats for the kids—and let’s be real, the adults, too! My dear friend Julia always throws a Halloween party that is the envy of the neighborhood, and last year, I faced the challenge of coming up with something that would stand out amidst her table of ghoulish goodies.
After a bit of brainstorming (and a few failed attempts at making pumpkin-shaped cookies), I stumbled upon an easy no-bake recipe that has since become my secret weapon: Marshmallow Rice Bubbles Halloween Brains. These sweets not only look adorably creepy—perfect for the occasion—but they’re also a breeze to whip up, allowing me to join in the festivities without feeling like a headless chicken in the kitchen.
Why These Are Halloween Treat Gold
Let me tell you why this recipe is an absolute gem for your Halloween gatherings:
– Stress-Free Fun: No baking means no timers to watch or ovens to clean, letting you focus on the spooky fun rather than kitchen chaos.
– Quick Prep: With just 20 minutes of hands-on time, you can whip up a batch of these brainy treats while still having enough time to don your witch’s hat.
– Kid-Approved: Kids love getting their hands messy, and this recipe encourages that (with a little adult supervision, of course). It’s a fun way to involve them in the holiday spirit!
– Versatile & Creative: Customize your “brains” with different food coloring or even add spooky eyes for an extra frightful flair.
I remember when I brought these to Julia’s party; her son, Max, couldn’t stop raving about how they looked like real brains. “Are they actually scary?” he asked, with wide, curious eyes. After one bite, he declared them the best treat of the night!
Essential Components
Creating these delightful brain treats is as easy as pie—or should I say, easy as a Halloween scare! Here’s what you’ll need:
– Unsalted Butter (85 g): This is essential for giving the marshmallow mixture that rich, gooey texture we all crave when indulging in sweet treats.
– Regular Marshmallows (6 cups): The star of the show! These fluffy sweets melt down into a deliciously sticky paste that holds everything together.
– Rice Bubbles (4 cups): The crunchy, airy components that give our “brains” their shape and texture. They add a delightful snap that contrasts beautifully with the gooey marshmallows.
– Salt (1/2 tsp): Just a hint of salt enhances the sweetness and balances the flavors, making each bite irresistible.
– Red Food Coloring: This is what transforms your Rice Bubbles into spine-tingling brain shapes. Get creative with how much you add to achieve your desired level of creepiness!
Note: You’ll find the complete list of ingredients, along with their exact measurements, in the printable recipe card at the bottom of this post.
Creating Halloween Brain Magic
Let’s dive into the creation of these spooky snacks! Here’s how to make them:
1. Prepare the Bain-Marie: Start by getting a small pot of water boiling. Place a large heatproof bowl over the pot. This setup will help melt your marshmallows without burning them.
2. Melt the Goodness: Add the butter and marshmallows into the bowl. Stir continuously for about 2-4 minutes, until it transforms into a smooth, gooey paste. This is the moment when your kitchen will start to smell like pure bliss!
3. Add Flavor and Color: Carefully remove the bowl from the heat (use oven mitts or a towel—trust me, it’s hot!). Stir in the salt and a drop or two of red food coloring. Whisk until you achieve a color that screams “Halloween!”
4. Mix with Rice Bubbles: In a separate large mixing bowl, pour in the Rice Bubbles. Then, drizzle the marshmallow mixture over them and mix thoroughly to ensure every last Rice Bubble is coated. You want them to be a lovely, sticky mess!
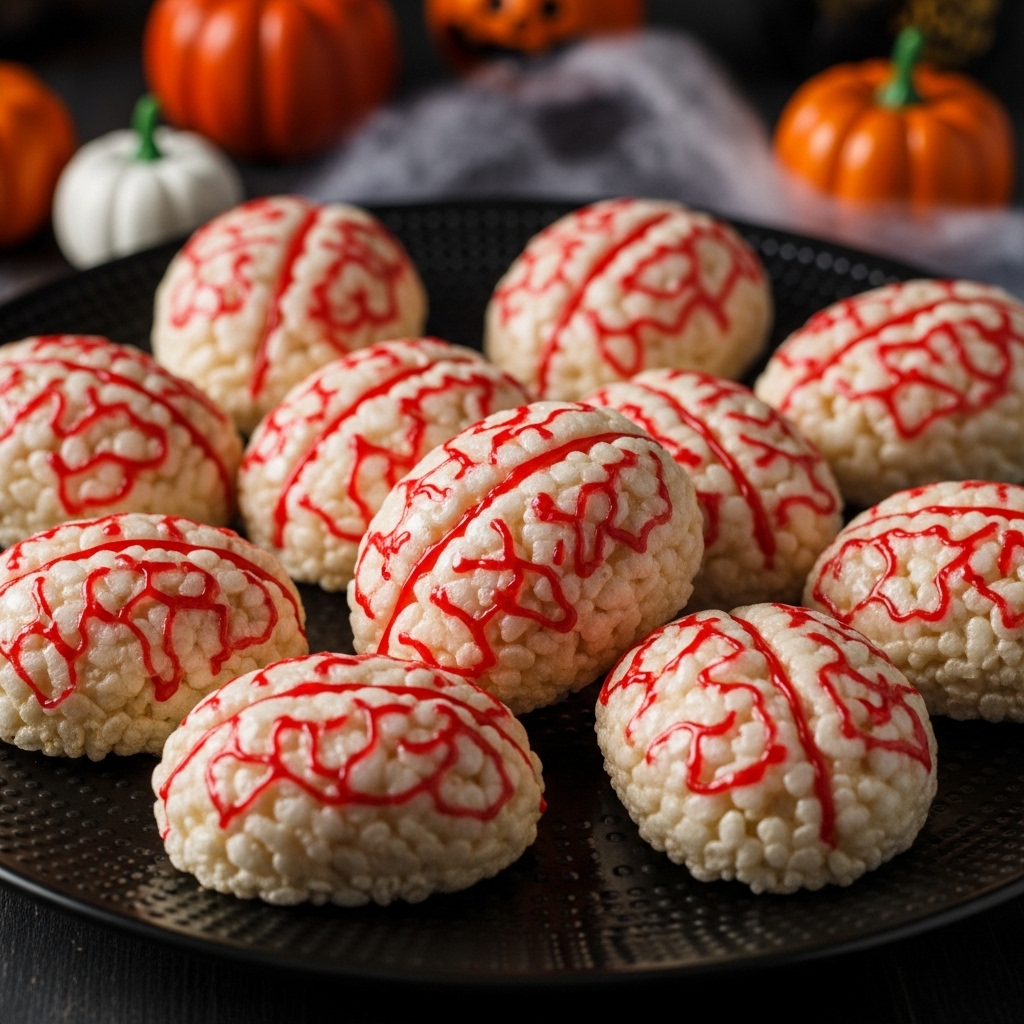
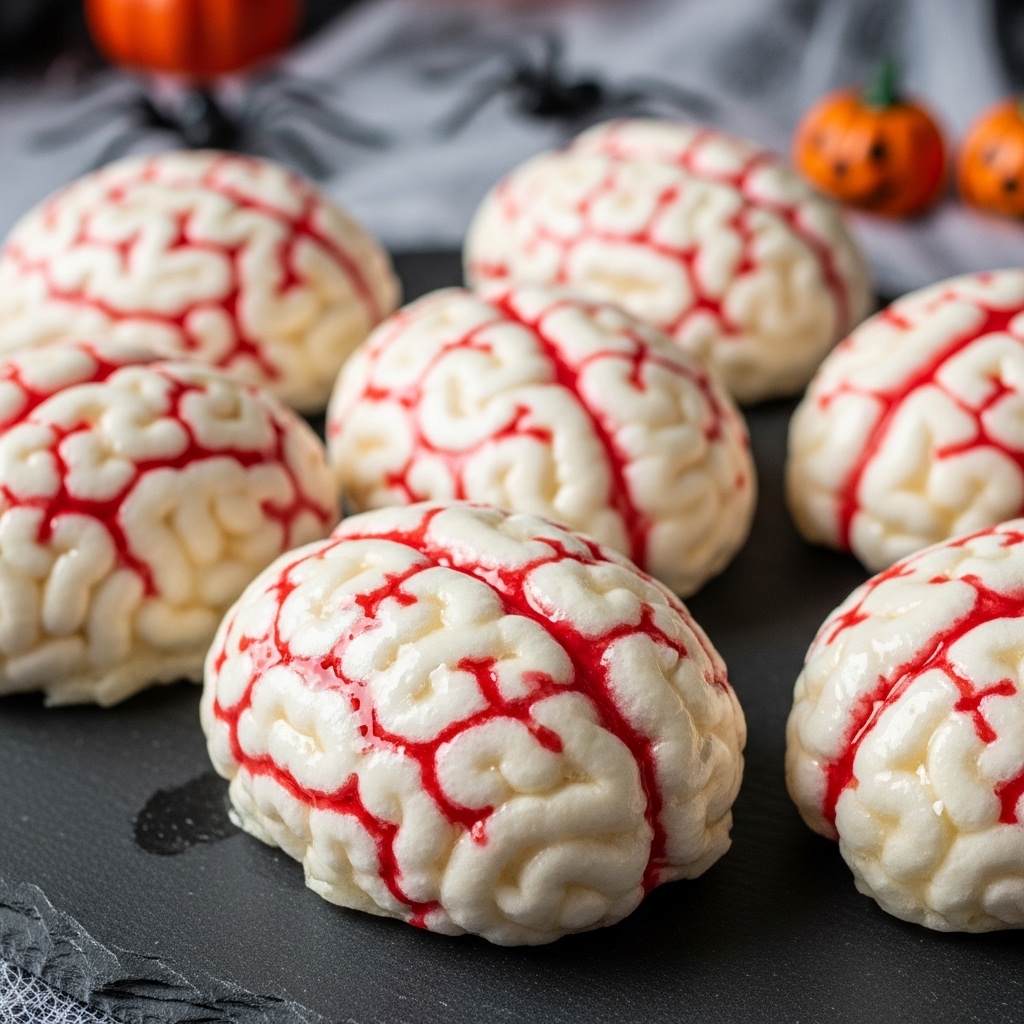
5. Shape Those Brains: Now, here’s where the fun begins! Lightly oil your hands to prevent sticking, and shape the mixture into oval “brains.” Use a butter knife to create a dent in the middle, then dip a toothpick in the remaining food coloring and draw some spooky veins for that extra detail.
6. Store and Enjoy: Place your creepy creations in an airtight container, where they’ll stay fresh for up to a week. Just try not to eat them all in one sitting!
Insights & Why It Works
The beauty of this recipe lies in its simplicity. The bain-marie method is a game changer, ensuring that your marshmallows melt evenly without any risk of scorching. This means you can focus on the fun stuff—like decorating the brains—without any stress about burnt marshmallows.
Another key player here is the Rice Bubbles. Their light, airy texture creates a delightful contrast to the sticky, sweet marshmallow, making each bite a fun explosion of flavor and texture. When you pull these out at a party, they not only taste great but also serve as an icebreaker; who wouldn’t want to try a spooky-looking treat?
One lesson I learned while making these is to not skimp on the food coloring. It’s easy to underestimate how much you’ll need for a vibrant hue, but a little extra can turn a simple treat into an eye-catching centerpiece!
Perfect Halloween Presentation
Make your treats even spookier during presentation! Consider serving them on a platter dressed in cobwebs (artificial, of course) and scatter some gummy worms around for that added creepy factor. You could also place them in small, clear cups, topped with a sprinkle of “graveyard dirt” (chocolate cookie crumbs) for a fun, thematic touch.
Creative Variations
This recipe is super adaptable! Here are a few ideas to make it uniquely yours:
– Colorful Brains: Use a mix of food coloring to create multi-colored brains. Imagine a rainbow of creepy treats!
– Chocolate Drizzle: Drizzle melted dark chocolate over the formed brains for a rich flavor contrast and a touch of elegance.
– Candy Add-Ins: Toss in some mini chocolate chips or M&M’s into the marshmallow mix for added sweetness and crunch.
– Nutty Twist: Mix in crushed nuts or seeds to the Rice Bubbles for a deliciously crunchy surprise.
– Spicy Surprise: Add a pinch of cayenne to the marshmallow mixture for an unexpected kick!
Make-Ahead Magic
One of the best things about these cute little brains is that they can be made in advance. Simply follow the recipe, shape the brains, and store them in an airtight container. You can make these a few days ahead of your Halloween gathering, giving you that crucial time to focus on other spooky preparations without the last-minute rush.
Halloween Brain Success Tips
– Don’t Rush the Melting: Take your time melting the marshmallows to ensure a smooth, lump-free mixture.
– Oiling Your Hands is Key: This makes the shaping process a hundred times easier and prevents the mixture from sticking.
– Be Generous with the Color: Don’t be shy about adding food coloring until you reach your desired level of “creepy.”
– Use a Butter Knife for Details: It’s the perfect tool for adding textures and details to your brain shapes.
Final Thoughts
As Halloween approaches, remember that it’s all about having fun and enjoying the moment, not stressing over elaborate treats. With these No-Bake Marshmallow Rice Bubbles Brains, you’ll not only impress your guests but also feel like a Halloween master. Just as I did last year at Julia’s party, you’ll be able to join in the laughter and fun, knowing your treat is a hit. So, grab those marshmallows and get to work—your Halloween celebration awaits!
Frequently Asked Questions
Can I make these the night before?
Absolutely! These can be made up to a week in advance, making them perfect for stress-free planning.
How do I prevent the Rice Bubbles from sticking?
Oiling your hands before shaping the mixture is crucial to keep everything from sticking.
Can I use different food coloring?
Yes, you can use any color you like. Get creative and make your brains as vibrant or spooky as you wish!
What’s the difference between regular marshmallows and mini marshmallows?
Regular marshmallows are ideal for this recipe because they melt down to create that perfect gooey texture, while mini marshmallows might not provide the same consistency.
How do I make these gluten-free?
Double-check that your Rice Bubbles are gluten-free, as some brands may contain gluten. Otherwise, the other ingredients are naturally gluten-free!