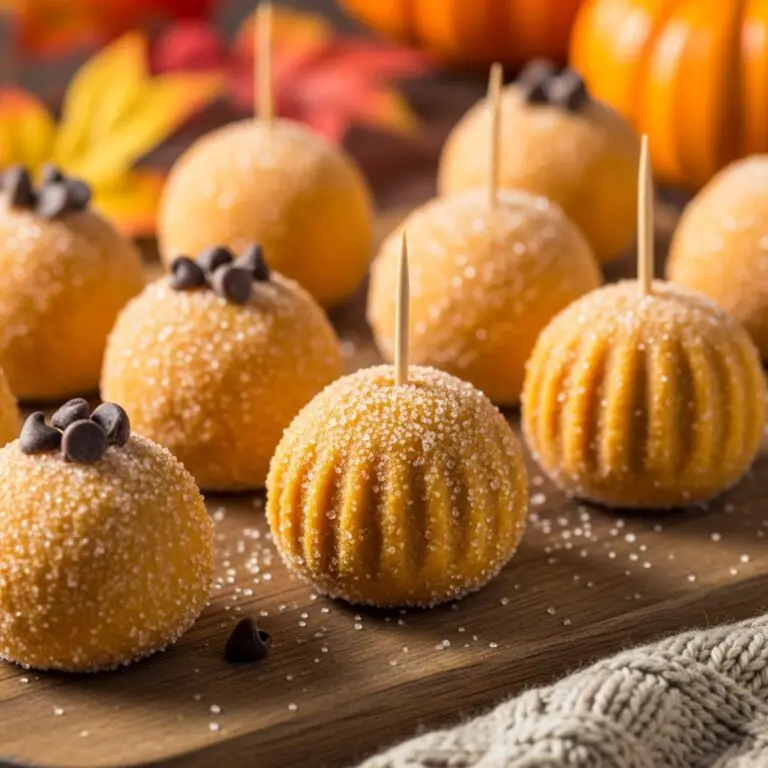
Coffee Cake Cookies
The Sweetest Solution to Your Dessert Dilemma (Coffee Cake Cookies)
Have you ever found yourself in a bind, trying to decide between a comforting slice of coffee cake and a warm, gooey cookie? Trust me, I’ve been there more times than I can count – usually fueled by too much caffeine and an insatiable sweet tooth. It’s a classic dilemma in our house—especially when my sister Jenna comes to visit. She’s a self-proclaimed coffee connoisseur, and I can’t tell you how many times we’ve debated over dessert choices, each insisting on our favorite treat.
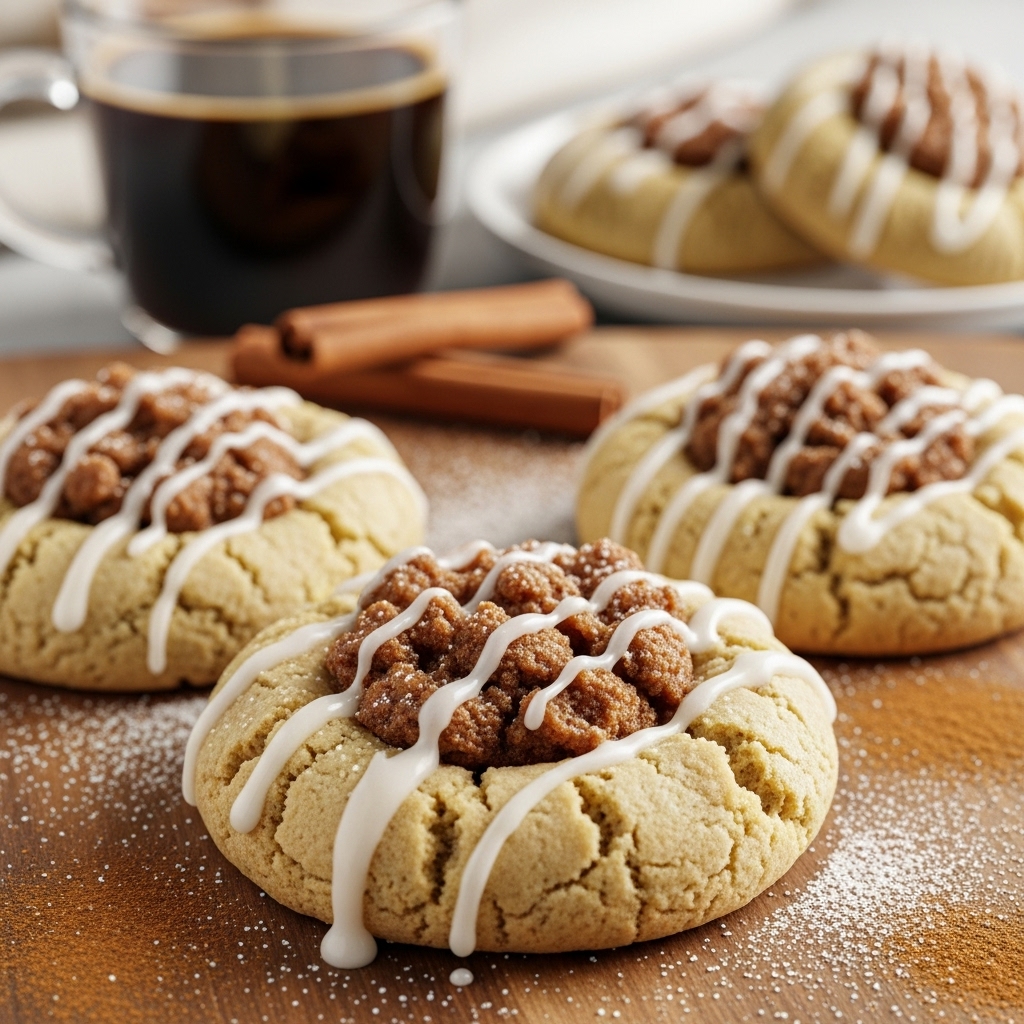
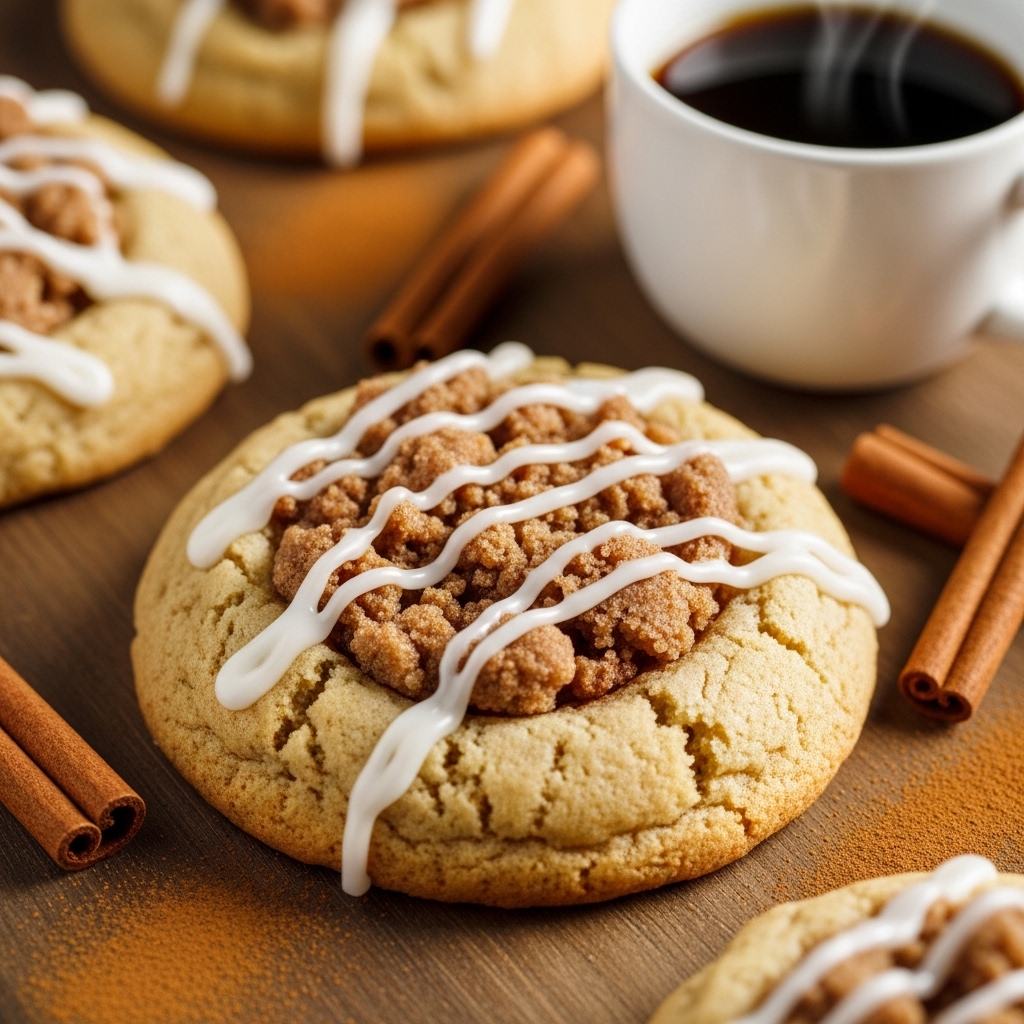
That’s when I came up with a solution that has saved many a dessert showdown: Coffee Cake Cookies. Imagine a cookie that encapsulates all the delightful flavors of a coffee cake—cinnamon, buttery streusel, and just a hint of sweetness from a drizzle of icing. These cookies have become my go-to answer for not just satisfying my cravings but also impressing guests with minimal effort.
Why These Are Cookie Gold
When it comes to baking, I’m all about recipes that not only taste great but also save time and reduce stress. Here’s why these Coffee Cake Cookies are a game-changer:
– Effortlessly Delicious: They combine the best of two worlds, making them a guaranteed crowd-pleaser at any gathering. Jenna raved about them the last time she visited, declaring them “better than any coffee shop treat!”
– Quick to Make: With a prep time of just 15 minutes and a total bake time under 20, you’ll have these cookies ready in no time, perfect for unexpected guests or an afternoon pick-me-up.
– Make Ahead Magic: You can prepare the streusel filling in advance, and the cookie dough can be rolled into balls and chilled, allowing you to bake them fresh at a moment’s notice.
– Versatile: Enjoy them warm out of the oven or let them cool for a delightful afternoon treat. They pair seamlessly with a cup of coffee or tea, turning any moment into a mini celebration.
Essential Components
To create these dreamy Coffee Cake Cookies, you’ll need a few key ingredients that bring the magic together:
– All Purpose Flour: Provides the cookie structure; it’s the backbone of your dough.
– Brown Sugar: Adds a delightful depth of flavor and moisture that makes these cookies chewy.
– Cinnamon: This warm spice is the star, infusing every bite with a comforting aroma reminiscent of freshly baked coffee cake.
– Butter: Both softened and cold butter are used—softened for creaming into the dough for rich flavor and cold for the streusel, creating that delightful crumbly texture.
– Egg: Perfectly binds everything together, ensuring each cookie holds its shape.
– Powdered Sugar: For the icing, it adds that sweet finishing touch we all love.
Note: You’ll find the complete list of ingredients, along with their exact measurements, in the printable recipe card at the bottom of this post.
Creating Cookie Magic
Let’s roll up our sleeves and dive into making these cookies. Trust me; you’ll want to take your time with this process—enjoy the aromas and get ready for pure deliciousness!
1. Prepare the Streusel Filling: In a medium bowl, combine the flour, brown sugar, cinnamon, and a pinch of salt. Start working in the softened butter with your fingers until the mixture resembles small clumps. This is the moment when your kitchen will start to smell amazing! Pop the streusel in the fridge to firm up while you prepare the dough.
2. Preheat the Oven: Set your oven to 400°F (200°C) and line two baking sheets with parchment paper or silicone baking mats. This step is crucial for easy cleanup!
3. Mix the Dry Ingredients: In a large bowl, whisk together the all-purpose flour, cake flour, cornstarch, cinnamon, baking soda, baking powder, and salt—setting aside this airy mixture for later.
4. Cream the Butter and Sugars: In your stand mixer, add the cubed cold butter along with both sugars. Cream until smooth and creamy, about 1-2 minutes. It should be light and fluffy!
5. Add the Eggs and Vanilla: Mix in the egg, egg yolk, and vanilla extract until well combined. Don’t be shy—use a rubber spatula to scrape down the sides to ensure everything is mixed evenly.
6. Incorporate the Dry Ingredients: Gradually add in the dry mixture, about a quarter cup at a time, mixing until just combined. You want to avoid overmixing here to keep your cookies tender.
7. Shape the Cookies: Scoop out the dough and roll it into approximately 8 large balls (or smaller for more cookies). Place them on your prepared baking sheets, giving them room to spread.
8. Create an Indent: Using your thumb or the end of a spoon (a little flour dusting on the tool helps), make a little dent in the center of each cookie. This is where the streusel will go—a perfect little pocket of happiness!
9. Fill with Streusel: Spoon about a tablespoon of the chilled streusel into each cookie indent. Now, you’re really going to want to resist the urge to snack because they smell heavenly!
10. Bake to Perfection: Pop the cookies in the oven and bake for about 8-11 minutes, or until the edges appear set and slightly golden. They’ll continue to bake a bit after you pull them out, so keep an eye on them to avoid overbaking!
11. Shape Them Up: For perfectly round cookies, grab a circular cookie cutter or a glass and gently swirl it around the cookie immediately after removing it from the oven. This little trick keeps them looking cute!
12. Cool and Drizzle: Let the cookies rest on the baking sheet for about 5 minutes, then transfer them to a cooling rack. Once cooled, whisk together your icing ingredients and drizzle over the tops. This step is like the cherry on top!
Insights & Why It Works
Why are these cookies so irresistible? It all boils down to the perfect balance of textures and flavors. The soft cookie base provides the ideal canvas for your buttery streusel filling, while the drizzle of powdered sugar icing not only adds sweetness but also a lovely sheen that makes them look bakery-worthy.
The combination of all-purpose flour and cake flour keeps the cookie tender yet structured, ensuring they hold up well but are still soft and melt-in-your-mouth. Brown sugar and cinnamon work in tandem, creating that signature flavor we adore in both coffee cake and cookies.
One of my biggest lessons learned while perfecting this recipe was to trust your instincts with baking times. As I pulled them out of the oven a little earlier than I thought necessary, that’s when I found the magic balance—cookies that were soft and chewy, rather than dry. It’s a fine line, but you’ll get the hang of it!
Perfect Coffee Break Presentation
When it comes to serving these beauties, presentation matters! Arrange them on a beautiful platter with fresh berries or a sprig of mint for a pop of color. To elevate the experience, consider pairing them with a rich coffee or a chai latte. You can even sprinkle a little extra cinnamon on top of the icing for that professional touch.
Creative Variations
One of the best parts about baking is getting creative! Here are a few fun variations you can try with these Coffee Cake Cookies:
– Nutty Surprise: Add chopped walnuts or pecans to the streusel filling for an extra crunch.
– Fruity Twist: Incorporate some diced apples or berries into the cookie dough for a fruity flavor kick.
– Chocolate Lovers: Swap out half the streusel filling for mini chocolate chips for a delightful contrast.
– Spiced Delight: Experiment with different spices such as nutmeg or ginger in the cookie dough for a unique taste experience.
Make-Ahead Magic
These Coffee Cake Cookies shine when it comes to make-ahead prep. You can easily prepare the streusel filling a day in advance, storing it in the fridge until you’re ready to bake. The cookie dough can also be rolled into balls and chilled, allowing you to bake them fresh any time you need a sweet treat.
Simply take the dough out of the fridge, let it sit for a few minutes to soften, then proceed with the indenting and filling steps as usual. This means you can whip them up for last-minute gatherings or cozy nights in without the fuss!
Coffee Cake Cookie Success Tips
– Don’t overbake: Keep a close eye on the cookies; they should be slightly underbaked when taken out of the oven to ensure they’re soft and chewy.
– Chill the dough: If you have time, chilling the dough before baking can help the cookies hold their shape and prevent spreading.
– Get creative: Feel free to add your favorite nuts, fruits, or even a splash of espresso powder to the dough for an added flavor boost.
Final Thoughts
Remember that dessert dilemma I mentioned earlier? With these Coffee Cake Cookies, you can say goodbye to those tough choices! Not only do they satisfy my cravings for both coffee cake and cookies, but they also allow me to look effortlessly competent when hosting friends and family.
Whether you’re enjoying them fresh out of the oven with a cup of coffee, or serving them at your next gathering, these cookies will make you feel like a baking superstar—without all the stress. So go ahead, whip up a batch, and get ready to impress! Your new favorite cookie is just a bake away.
Frequently Asked Questions
Can I make these the night before?
Absolutely! You can prepare the streusel filling and cookie dough ahead of time. Just store them in the fridge and bake fresh cookies when you’re ready.
How do I prevent the cookies from spreading too much?
Chilling the dough for at least 30 minutes can help prevent excessive spreading while baking.
Can I use different sugars?
Yes! You can substitute granulated sugar for brown sugar, but keep in mind that it may change the flavor and moisture level slightly.
What’s the difference between all-purpose flour and cake flour?
All-purpose flour is versatile and provides structure, while cake flour is lighter and gives a more tender crumb, which is why we use both in this recipe.
How do I store leftover cookies?
Store any leftover cookies in an airtight container at room temperature for up to 3 days, or freeze them for longer storage!