Burnt Basque Cheesecake in a Loaf Pan
The Ultimate Comfort Dessert: Burnt Basque Cheesecake in a Loaf Pan (A Creamy Indulgence for Small Gatherings)
There’s something about the holidays that brings out my inner pastry chef. Last Christmas, I decided to host a cozy gathering for a close-knit group of friends, eager to impress them with an array of delectable desserts. But I quickly faced a daunting dilemma: how could I whip up something that felt luxurious yet was simple enough for someone who wasn’t a professional baker? After a bit of thought, I realized I needed a dessert that would steal the show without stealing my sanity.
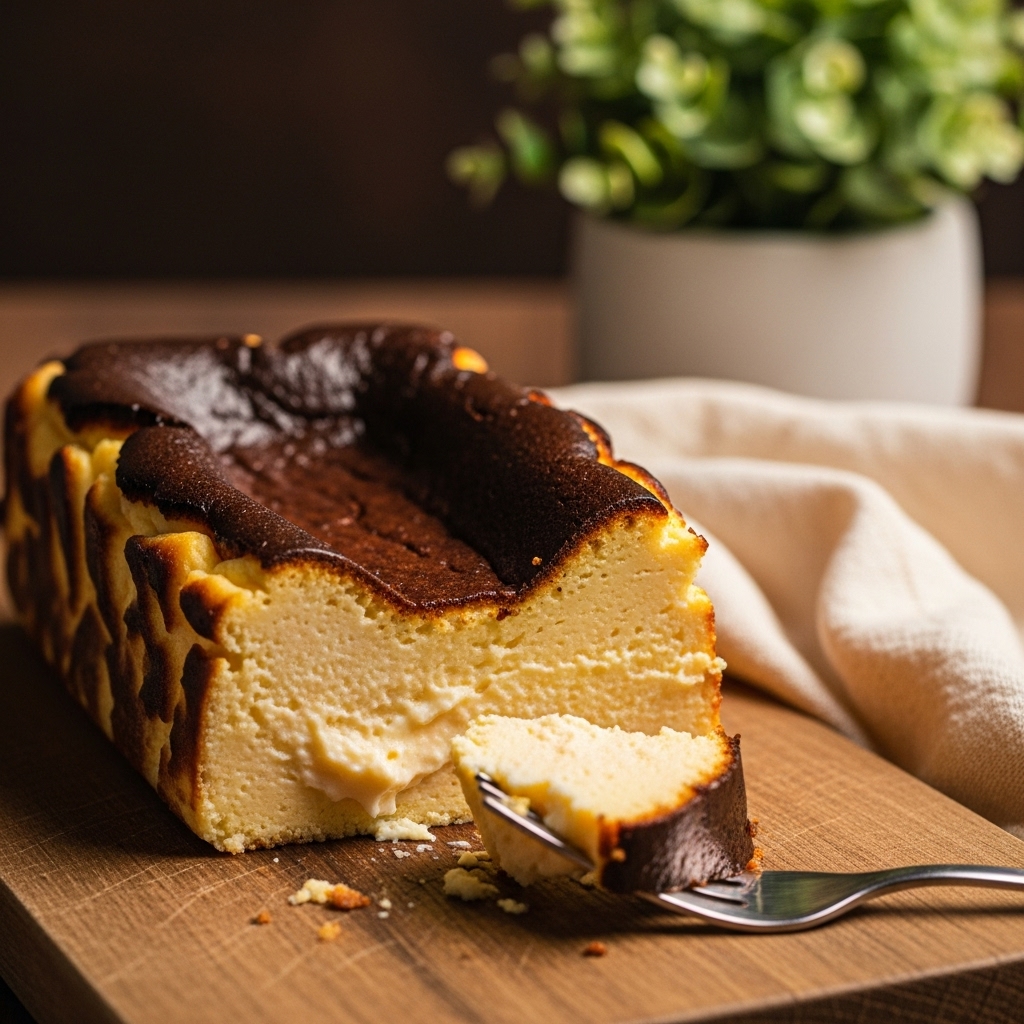
Enter the Burnt Basque Cheesecake. With its rich, creamy texture and that beautifully caramelized top, this cheesecake is the perfect solution to my holiday hosting challenge. It’s a dessert that not only looks divine but also requires minimal effort, allowing me to enjoy the evening with my friends rather than being stuck in the kitchen. Plus, baking it in a loaf pan means it’s a small-batch treat, perfect for intimate gatherings.
Why This is Cheesecake Gold
Let me tell you, this cheesecake is a game changer. Here’s why you’re going to want it in your dessert arsenal:
– Effortlessly Elegant: The dramatic burnt top and silky interior make it look and taste like you’ve spent hours crafting it, when in reality, it comes together in just 10 minutes of prep.
– Small Batch Perfection: Ideal for when you’re entertaining a small group or just indulging yourself—this recipe yields six generous slices, just enough to share (or not!).
– No-Fuss Baking: With straightforward steps and a forgiving baking time, even novice bakers can achieve that Instagram-worthy finish.
– Make-Ahead Friendly: This cheesecake can be prepared the day before, allowing the flavors to develop overnight. You’ll thank yourself come serving time!
A friend of mine, Sarah, recently made this for her family game night, and she couldn’t stop raving about how easy it was. “I felt like a baking wizard!” she said. If that doesn’t convince you, I don’t know what will!
Essential Components
Let’s break down the ingredients to see what makes this cheesecake so special. Each component plays a vital role in creating that luscious flavor and texture we’re after.
– 1 1/2 cups cream cheese, softened: This is the heart of your cheesecake, giving it that rich, creamy texture that melts in your mouth.
– 1/2 cup granulated sugar: Sweetness is key here, balancing the richness of the cream cheese and contributing to that caramelized top.
– 2 large eggs, room temperature: These bind the ingredients, adding structure and a touch of creaminess to the filling.
– 3/4 cup heavy cream: The secret weapon for an ultra-creamy consistency, making each bite feel like a luxurious treat.
– 1/2 teaspoon vanilla extract: A dash of vanilla adds depth and warmth, enhancing the overall flavor profile.
– 1/8 teaspoon salt: Just a pinch to elevate all the flavors—trust me, it makes a difference!
– 1 tablespoon all-purpose flour: This helps to stabilize the cheesecake, ensuring it holds its shape while still being wonderfully soft.
Note: You’ll find the complete list of ingredients, along with their exact measurements, in the printable recipe card at the bottom of this post.
Creating Cheesecake Magic
Ready to make some magic happen? Here’s how to whip up your very own Burnt Basque Cheesecake:
1. Preheat the Magic: Start by preheating your oven to 400°F (200°C). Line a loaf pan with parchment paper, making sure to leave some overhang—this will make removing the cheesecake a breeze later on.
2. Beat the Base: In a large mixing bowl, beat the softened cream cheese and sugar together until it’s smooth and fluffy. This step is crucial; you want to incorporate as much air as possible for that light texture.
3. Eggs, One at a Time: Add the eggs, one at a time, mixing thoroughly after each addition. This gentle incorporation keeps the mixture airy.
4. Pour in the Cream: Now, add that luscious heavy cream, vanilla extract, and the pinch of salt. Beat it all together until it’s beautifully silky—this is where the magic starts to happen!
5. Sift and Fold: Sift in the flour and gently fold it into the batter. You want to mix just until combined; over-mixing can lead to a denser texture.
6. Prep and Pour: Pour the batter into your prepared loaf pan, then give it a gentle tap on the counter to release any pesky air bubbles.
7. Bake to Perfection: Bake for 40–45 minutes, or until the top is deeply golden and the center still jiggles slightly. Yes, it should jiggle! That’s the secret to a perfect texture.
8. Cool and Chill: Once out of the oven, allow it to cool to room temperature before refrigerating for at least four hours (preferably overnight) before slicing. Patience is key here, my friend!
Insights & Why It Works
Now, let’s take a moment to reflect on what makes this cheesecake so brilliant. The baking method is truly unique. The high oven temperature creates that signature burnt top while keeping the center delightfully custardy. The loaf pan, often overlooked for desserts, is a fantastic choice for small batches, allowing for easy slicing and serving.
One of my favorite moments while perfecting this recipe was realizing the importance of the resting period in the fridge. It’s like letting a good idea marinate; the flavors meld together beautifully, and the texture firms up just enough to make slicing effortless. So, if you’re ever in doubt, just remember: patience pays off!
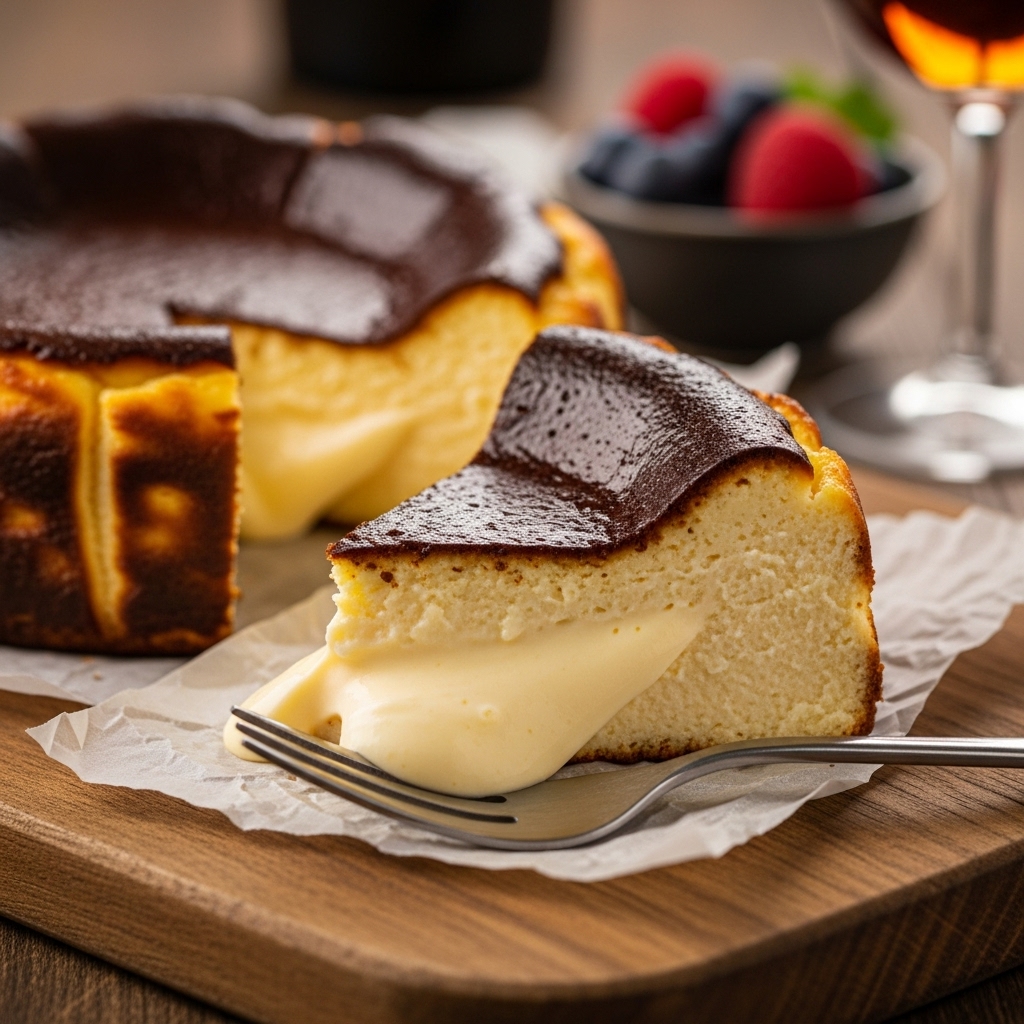
As for the flavor—oh, the flavor! The combination of cream cheese and heavy cream creates that rich, decadent mouthfeel that makes each bite feel like a hug from the inside out. And the hint of vanilla? It elevates the entire experience, turning a simple dessert into something memorable.
Perfect Dessert Presentation
When it comes to serving this beauty, less is more. I love to dust the top with a light sprinkle of powdered sugar for a touch of elegance. Pair it with fresh berries or a drizzle of caramel sauce to add a burst of color and flavor. It’s also delightful alongside a hot cup of coffee or a glass of dessert wine—perfect for winding down after a busy evening.
Creative Variations
The beauty of this cheesecake is its adaptability! Here are a few variations to consider:
– Citrus Zing: Add the zest of a lemon or orange to the batter for a refreshing twist.
– Chocolate Indulgence: Fold in some melted chocolate for a rich, chocolatey version.
– Nutty Delight: Top with chopped pistachios or almonds for a crunchy contrast.
– Swirl Magic: Incorporate a swirl of raspberry or blueberry puree into the batter before baking for a fruity burst.
– Spice it Up: A pinch of cinnamon or nutmeg can add warmth and depth to the flavor.
Make-Ahead Magic
One of the standout features of this cheesecake is its make-ahead capability. Prepare it a day or two in advance, and store it covered in the fridge. Not only does this save you time on the day of your gathering, but it also allows the flavors to deepen. Just bring it out to room temperature before serving, and you’ll have a show-stopping dessert ready to impress without any last-minute fuss!
Cheesecake Success Tips
– Don’t Overbake: Keep a close eye on your cheesecake—if the center doesn’t jiggle slightly, it’s likely overdone.
– Room Temperature Ingredients: Make sure your cream cheese and eggs are at room temperature for easy blending.
– Let It Rest: Refrigerate the cheesecake for at least four hours, or overnight for the best results.
– Use Parchment Paper: The overhang of parchment paper is your best friend—don’t skip this step for easy removal.
Final Thoughts
As I reminisce about that cozy holiday gathering, I’m reminded of how this Burnt Basque Cheesecake was the star of the evening. Not only did it solve my dessert dilemma, but it also allowed me to focus on enjoying time with my friends. The creamy, rich texture and that show-stopping caramelized top had everyone asking for seconds, and I couldn’t have felt more accomplished. This recipe is a beautiful way to impress your guests while keeping stress at bay. Trust me, with this dessert, you’ll look effortlessly competent, and you might even find yourself basking in compliments. Happy baking!
Frequently Asked Questions
– *Can I make this the night before?*
Absolutely! In fact, I recommend it to let the flavors develop. Just refrigerate it until ready to serve.
– *How do I prevent the cheesecake from cracking?*
Avoid overbaking and let it cool gradually in the oven with the door slightly ajar to prevent sudden temperature changes.
– *Can I use a different type of pan?*
While a loaf pan is preferred for this recipe, you can use an 8-inch round cake pan. Just adjust baking time as needed.
– *What’s the difference between this and a regular cheesecake?*
The Basque version is baked at a high temperature for a short time, resulting in a burnt top and a soft, custardy center—totally unique!
– *Can I add flavors to the batter?*
Definitely! You can add citrus zest, chocolate, or even spices to customize it to your taste.
Now, armed with this recipe and all its tips, you’re ready to become the cheesecake hero of your next gathering. Happy baking!