Brain Cake
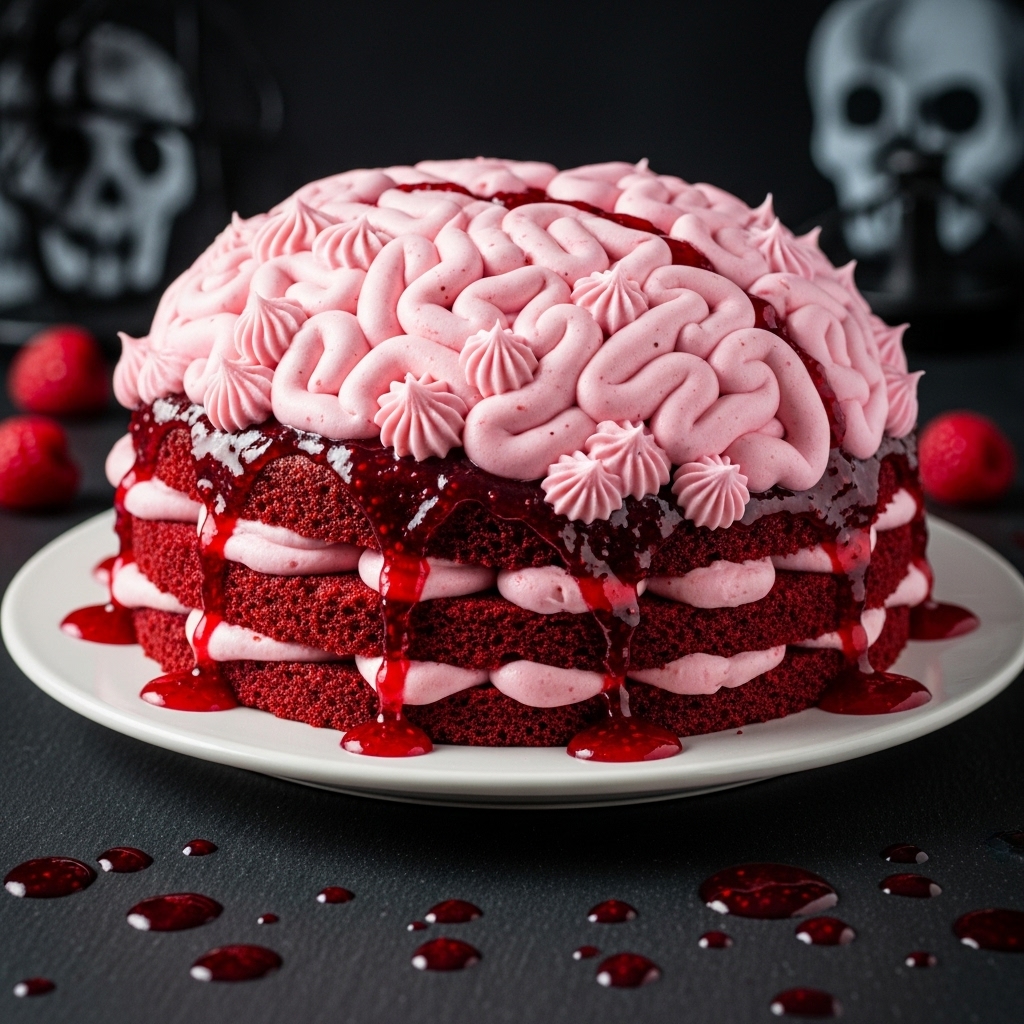
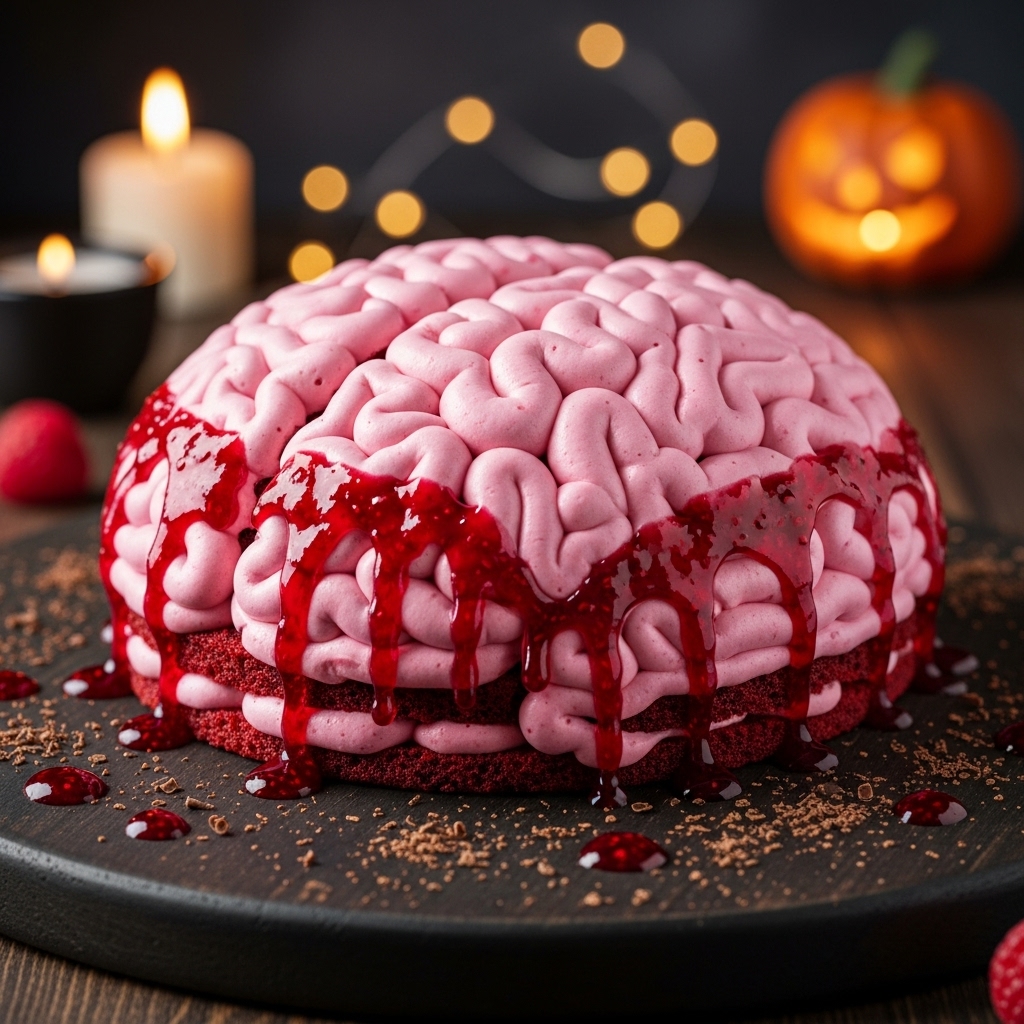
A Spooktacular Solution for Halloween Festivities (Moist Red Velvet Brain Cake)
Every October, as the leaves turn and the air grows crisp with anticipation, I am reminded of my favorite holiday—Halloween. It’s not just about the costumes or the clever decorations; it’s about gathering friends and family to share in the eerie excitement. I still chuckle at the memory of last year’s Halloween party when my friend Lisa, the self-proclaimed Halloween queen, decided to challenge me to whip up something truly creepy. As I scratched my head pondering the ultimate frightful dessert, inspiration struck: a brain cake! With its moist red velvet layers and sinister raspberry jam “blood,” it was the perfect conversation starter and a showstopper on the table.
If you’ve ever found yourself scrambling for a standout dessert for a gathering, especially one as festive as Halloween, this Brain Cake is your breakthrough solution. It will not only leave your guests gasping—both in delight and a tad bit of horror—but it allows you to embrace the holiday without a meltdown in the kitchen.
Why This Brain Cake is Halloween Gold
– Eye-Catching Presentation: This cake doesn’t just taste incredible; it’s a head-turner! The brain shape and vibrant colors add that perfect spooky flair to your celebration.
– Moist and Delicious: With layers of rich red velvet and creamy buttercream, this cake is a melt-in-your-mouth delight that will have your guests coming back for seconds.
– Perfect for Sharing: It serves up to 20 people, making it ideal for both large gatherings and intimate parties where you want everyone to have a slice of the fun.
– Impressively Simple: Despite its elaborate appearance, the recipe is straightforward and manageable, ensuring you look like a pro without the stress.
– Make Ahead of Time: You can easily bake and assemble this cake a day in advance, freeing you up to enjoy your Halloween festivities.
I still remember Lisa’s wide-eyed reaction when she took the first bite. “This is not just a cake; it’s a masterpiece!” she exclaimed, a sprinkle of raspberry jam on her cheek. That moment solidified my love for this recipe.
Essential Components
To create this spooktacular cake, you’ll need a few essential ingredients that bring it to life:
– Cake Flour: The backbone of the cake, it gives it a light and fluffy texture, perfect for soaking up that luscious buttercream.
– Unsweetened Cocoa Powder: Just a touch enhances the rich flavor of the red velvet without overpowering it.
– Granulated Sugar: Sweetness is key! It balances the cocoa and helps to keep the cake moist.
– Buttermilk: This adds a tangy richness and keeps the cake tender.
– Red Gel Food Coloring: The star of the show! It gives the cake its signature red hue, making it unmistakably “bloody.”
– Cream Cheese: A must for the frosting—its tanginess pairs perfectly with the sweetness of the buttercream.
– Raspberry Jam: This adds a deliciously sinister touch of “blood” that oozes out when you slice into the cake.
Note: You’ll find the complete list of ingredients, along with their exact measurements, in the printable recipe card at the bottom of this post.
Creating Brain Cake Magic
Ready to impress? Let’s dive into the steps of creating your very own Brain Cake!
1. Prep the Dry Ingredients: In a bowl, whisk together the cake flour, cocoa powder, baking soda, and salt. This will be the base of your cake, so give it a good mix to ensure everything is evenly distributed.
2. Cream the Butter and Sugar: In a separate mixer bowl, beat the unsalted butter and granulated sugar until light and fluffy. This usually takes about 3-5 minutes. You want it to be paler in color to ensure that fluffy texture.
3. Incorporate the Eggs and Buttermilk: Add the eggs, buttermilk, vegetable oil, vanilla extract, vinegar, and red gel food coloring. Mix until just combined; don’t overdo it!
4. Combine the Dry and Wet Ingredients: Gradually mix the dry ingredients into the wet, just until you see no streaks of flour. This is where the magic happens—don’t be shy about getting that vibrant red!
5. Bake: Divide the batter evenly between two greased round cake pans and pop them in a preheated oven at 350°F (175°C) for about 27 minutes. The smell will be heavenly!
6. Make the Buttercream: While the cakes cool, beat the cream cheese and butter until smooth, then gradually add the powdered sugar and heavy cream. Add a small squirt of red food coloring for that perfect pink hue.
7. Assemble the Cake: Once the cakes are cool, spread a layer of frosting on the first, top it with raspberry jam, and place the second layer on top. Frost the entire cake and get creative with the decorations!
8. Add the Finishing Touches: If you’re feeling adventurous, a drizzle of additional raspberry jam can mimic “blood” running down the sides, adding to the spooky effect.
Insights & Why It Works
This Brain Cake is more than just a fun Halloween treat; it’s a lesson in creativity and simplicity. The red velvet base, paired with the sweet yet tangy cream cheese buttercream, creates a flavor profile that’s both decadent and unique. But what truly sets this cake apart is its presentation.
Using gel food coloring ensures that the cake maintains its vibrant color without altering the flavor. The combination of the moist cake and the creamy frosting makes each bite feel indulgent, while the raspberry jam adds a delightful tartness that keeps it from becoming overly sweet.
A key takeaway I learned while perfecting this recipe is the importance of letting your cakes cool completely before frosting. This small step can make a world of difference! Trust me; you don’t want a melted frosting disaster on your hands!
Perfect Halloween Presentation
When it comes to serving your Brain Cake, creativity is key! A simple white cake stand will elevate its dramatic appearance. Consider adding some plastic spiders or gummy worms around the base for an extra spooky touch. You could also serve slices with a side of whipped cream and a sprinkle of edible glitter for a fun effect.
Creative Variations
This cake is incredibly adaptable! Here are a few variations to consider:
– Chocolate Ganache Drizzle: Instead of raspberry jam, top the cake with a rich chocolate ganache for a decadent twist.
– Colored Frosting: Experiment with different food colors to create a more vibrant, multi-colored frosting.
– Add-Fruit Flavor: Swirl in some fresh fruit puree into the buttercream for an unexpected burst of flavor.
– Cupcake Version: Turn this recipe into spooky brain cupcakes, using a piping bag to create the brain effect on top.
– Spice It Up: Add a teaspoon of cinnamon or nutmeg to the batter for a warm, autumnal flavor.
Make-Ahead Magic
One of the best features of this Brain Cake is how well it stores. You can bake the layers a day or two in advance—just wrap them tightly in plastic wrap and store them in the fridge. The frosting can be made ahead too; just keep it in an airtight container. On the day of your gathering, simply assemble the cake and get ready for the compliments to roll in. It’s a total lifesaver for stress-free entertaining!
Brain Cake Success Tips
– Use Room Temperature Ingredients: This helps everything combine more easily and results in a fluffier cake.
– Don’t Rush the Cooling: Let your layers cool completely to prevent melting your frosting.
– Test for Doneness: A toothpick inserted into the center should come out clean—if it has batter on it, give it a few more minutes.
– Chill the Frosting: If it’s too soft to pipe, pop it in the fridge for a bit before decorating.
Final Thoughts
As Halloween approaches, let this Brain Cake be your secret weapon in the kitchen. With its terrifyingly delightful appearance and scrumptious flavor, you’ll amaze your guests while taking the stress out of dessert. I can’t wait for you to experience the joy of watching friends marvel at your creation—just like Lisa did! So roll up your sleeves and embrace the spookiness; it’s time to bake!
Frequently Asked Questions
Can I make this cake the night before?
Absolutely! Just bake and frost it, then cover it tightly and store it in the fridge overnight.
How do I prevent the cake from sticking to the pan?
Make sure to grease the pans well and consider using parchment paper at the bottom for easy removal.
Can I use a different flavor for the cake?
Yes! You can try chocolate, vanilla, or even a spice cake—just adjust the food coloring accordingly for a spooky effect.
What’s the difference between gel and liquid food coloring?
Gel food coloring is more concentrated, which gives you a richer color without altering the cake’s consistency.
How do I store leftovers?
Keep any leftover cake in an airtight container in the fridge for up to a week. Just be aware that the raspberry jam may soak into the cake over time!