Vanilla Cake
The Ultimate Solution for Celebratory Cakes (Classic Vanilla Cake Recipe)
There’s something magical about a beautifully baked cake. I remember the first time my daughter, Lily, asked me to make a cake for her birthday. She had her heart set on a classic vanilla cake, like the ones I used to bake with my grandmother. The challenge? Trying to create a masterpiece that would impress her friends, while also managing the inevitable chaos that comes with hosting a party for a gaggle of excited kids. After a few trial runs and a sprinkle of patience, I discovered a foolproof recipe that not only saved my sanity but also made me look like a baking superstar. Spoiler alert: it’s this very classic vanilla cake recipe, and it’s become my go-to solution for any celebration.
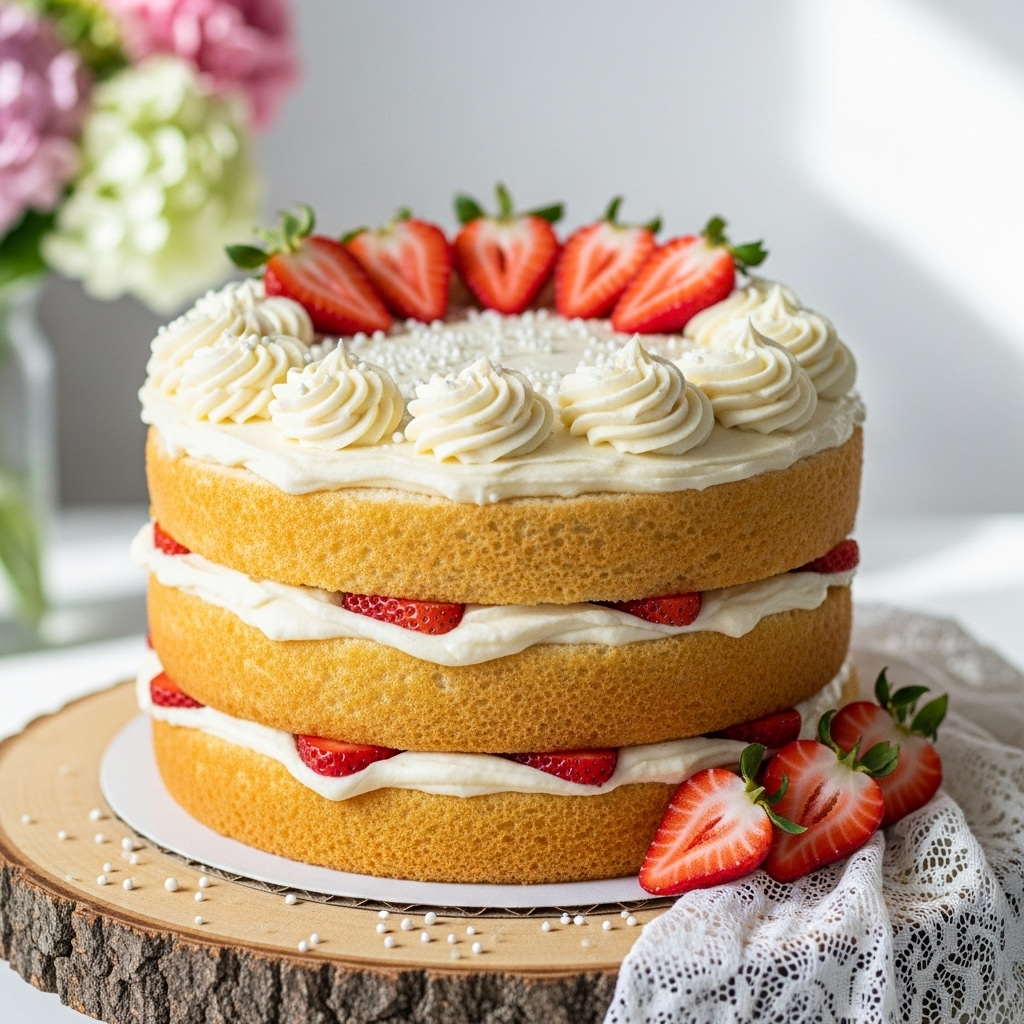
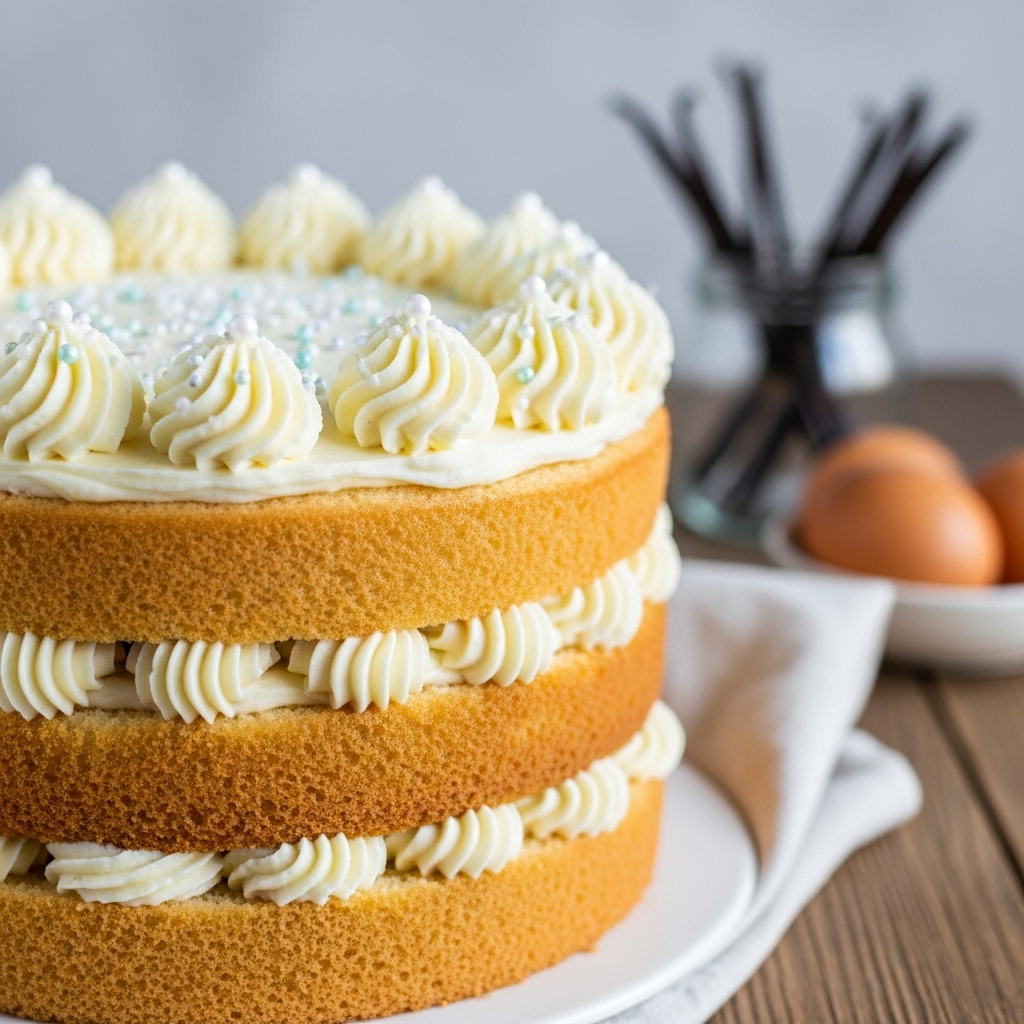
This vanilla cake is not just any cake; it’s a celebration in three delightful layers that’s sure to bring joy to any gathering. Whether it’s a birthday bash, an anniversary, or a simple weekend treat, this cake makes you look effortlessly competent and allows you to bask in the compliments instead of fretting over the oven.
Why This Cake is Party Gold
– Effortlessly Elegant: With its delicate layers and rich buttercream frosting, this cake looks as good as it tastes, making it the star of the dessert table.
– Simple Ingredients, Big Flavor: The beauty of this recipe lies in its straightforward, pantry-friendly ingredients that come together to create a deliciously moist cake.
– Make-Ahead Marvel: You can bake and freeze the layers ahead of time, making day-of preparations a breeze. Trust me, nothing beats stress-free entertaining!
– Versatile Base: This classic vanilla cake is the perfect canvas for your favorite fillings and frostings, so you can customize it to match any theme or preference.
– Crowd-Pleaser: I once brought this cake to a potluck, and it disappeared in minutes. My friend Sarah still raves about it, claiming it’s the best cake she’s ever had!
Essential Components
To create this delightful vanilla cake, a few key ingredients make all the difference. Here’s what you’ll need:
– Cake Flour: This is the backbone of your cake, providing a tender crumb that makes every slice melt in your mouth.
– Butter: Two sticks of room-temperature butter not only add richness but also lend a creamy texture that elevates your cake.
– Egg Whites: Whipping these separately ensures a light and airy texture, transforming your cake into a fluffy masterpiece.
– Sour Cream: This secret ingredient adds moisture and a slight tang, balancing the sweetness beautifully.
– Vanilla Extract: Use quality vanilla for a truly aromatic flavor that brings everything together in perfect harmony.
Note: You’ll find the complete list of ingredients, along with their exact measurements, in the printable recipe card at the bottom of this post.
Creating Cake Magic
Now that you have your ingredients ready, let’s dive into the steps to create this vanilla cake magic!
1. Preheat & Prepare: Preheat your oven to 350°F (177°C). Butter and flour three 6-inch cake tins, and line them with parchment paper. This ensures easy removal and perfect layers!
2. Mix the Dry Ingredients: In a medium bowl, whisk together the cake flour, salt, baking powder, and baking soda. This blend sets the stage for your cake’s structure.
3. Combine Wet Ingredients: In a small bowl, mix the milk, sour cream, and vanilla extract. Set this aside—this mixture will add moisture and flavor to your cake.
4. Cream Butter and Sugar: Using a stand mixer or handheld mixer with the paddle attachment, beat the room-temperature butter and sugar on medium speed for about three minutes until smooth and creamy. Scrape the sides of the bowl to ensure everything is well combined.
5. Incorporate Egg Whites: In a separate bowl, whisk the egg whites together. Gradually drizzle them into the butter-sugar mixture while on low speed. Once all are added, crank up the speed to high for 1-2 minutes. It may look a bit curdled, but don’t worry—it will come together beautifully!
6. Add Dry and Wet Ingredients: On low speed, add half of the dry ingredients, mixing until just combined. Follow with half of the milk mixture. Repeat this process, alternating until everything is combined. Gently fold any remaining bits by hand with a spatula—this avoids overmixing.
7. Bake: Pour the batter evenly into the prepared pans, filling them about one-third full. Bake for 30-35 minutes, or until a toothpick inserted in the center comes out clean. Your kitchen will smell heavenly!
8. Cool & Remove: Allow the cakes to cool in the pans for 15-20 minutes. Then gently remove them and let them cool completely on a wire rack. Don’t be tempted to frost until they’re completely cooled; it’s worth the wait!
Insights & Why It Works
What makes this vanilla cake a true gem is its simplicity paired with a couple of key techniques. The method of creaming the butter and sugar is crucial—it incorporates air into the batter, resulting in a lighter cake. The addition of egg whites, whipped to incorporate air, enhances this fluffiness.
Then there’s the sour cream. It’s not just for dips and dressings; in baking, it’s like a secret weapon. It adds moisture without making the cake too dense, giving it that perfect tenderness. And as I discovered with Lily’s birthday cake, the make-ahead aspect is a lifesaver. Bake the layers a day or two in advance, wrap them tightly, and you’ll be ready to frost and serve without the last-minute panic.
As I perfected this recipe, I learned to keep my mixer speed low when adding the dry ingredients. This little tip prevented flour clouds and kept my kitchen clean—an unexpected win during cake prep!
Perfect Cake Presentation
To present your cake like a pro, consider decorating with fresh berries and a dusting of powdered sugar for a pop of color. A simple buttercream frosting, perhaps flavored with a hint of lemon or almond, can elevate the classic vanilla taste. Serving slices with a dollop of whipped cream and a sprig of mint can make each plate feel special.
Creative Variations
This vanilla cake is incredibly versatile! Here are a few ideas to switch things up:
– Chocolate Twist: Replace a portion of the flour with cocoa powder for a rich chocolate version.
– Fruit Flavor: Fold in fresh or frozen berries to the batter for a fruity surprise in every bite.
– Spice it Up: Add a teaspoon of cinnamon or nutmeg to the dry ingredients for a warm, cozy flavor.
– Lemon Zing: Incorporate lemon zest into the batter and replace some of the milk with fresh lemon juice for a refreshing twist.
– Nutty Addition: Chop up some walnuts or almonds and fold them in for extra texture and flavor.
Make-Ahead Magic
One of the best parts about this vanilla cake is how easy it is to prepare in advance. Bake the layers a day or two before your event, let them cool completely, wrap in plastic wrap, and store in the refrigerator (or freeze for longer storage). This way, on the day of your celebration, all you need to do is whip up the frosting, assemble the cake, and dive into the festivities—free of stress and fully present for your guests.
Vanilla Cake Success Tips
– Don’t Overmix: Once you combine the wet and dry ingredients, mix just until combined. Overmixing can lead to a dense cake.
– Bake Evenly: Ensure your oven is fully preheated before placing your cakes in, and rotate the pans halfway through for even baking.
– Room Temperature Ingredients: Make sure your butter, milk, and eggs are at room temperature for better mixing and a fluffier cake.
– Cooling Time: Allow the cakes to cool completely before frosting; this prevents melting and sliding of your frosting.
Final Thoughts
Reflecting on Lily’s birthday, I’m reminded of how much joy a simple cake can bring. Beyond the flour and sugar, it was the love from family and friends that made the day special. By having this classic vanilla cake recipe under your belt, you’re not just baking a dessert; you’re crafting memories. So, whether it’s a birthday, an anniversary, or just a Tuesday, whip up this cake, impress your guests, and relish the compliments. You’ve got this!
Frequently Asked Questions
Can I make this cake in advance?
Absolutely! Bake the layers, cool them, wrap tightly, and store in the fridge for up to two days, or freeze for longer.
How do I prevent my cake from sticking?
Make sure to properly butter and flour your cake pans and use parchment paper at the bottom for easy release.
Can I use different flour?
While cake flour works best for a tender crumb, you can try all-purpose flour—just note it might affect the texture slightly.
What’s the difference between baking powder and baking soda?
Baking powder contains both an acid and a base, which means it can leaven on its own, while baking soda requires an acid (like sour cream) for activation.
How can I prevent my cake from doming?
To achieve flat layers, you can use cake strips around your pans to ensure even baking, or simply lower the oven temperature by 25°F and bake a little longer.