Halloween Witch Hat Cookies
Spellbinding Sweets for Spooktacular Gatherings (Halloween Witch Hat Cookies)
Ah, Halloween—the time of year when our imagination runs wild, and our kitchens transform into cauldrons of creativity. I still remember the first Halloween I tried to impress my kids with homemade treats. Our living room was a whirl of costume fittings and pumpkin carving, and my little ghosts and goblins were buzzing with excitement. But as the clock ticked down to our big Halloween party, I felt the familiar knot of panic tightening in my stomach. How on earth was I going to pull off a dessert that would wow all the neighborhood kids without losing my mind?
Enter the Halloween Witch Hat Cookies—a delightful solution that turned my chaotic Halloween into a fun-filled memory. With their chocolatey goodness and whimsical presentation, these cookies became my go-to for impressing party guests, while still allowing me to enjoy the festivities. They’re a magical treat that’s easy to customize and, best of all, a fantastic activity to share with my kids. Let me share this spellbinding recipe that will have you feeling like the Halloween hosting hero.
Why These Are Halloween Treat Gold
These Halloween Witch Hat Cookies are not just adorable; they’re a game-changer for your Halloween festivities!
– Kid-Friendly Fun: Perfect for little hands, these cookies are a fun project to do together. My kids loved piping the icing and decorating their witch hats!
– Customization Galore: With different colors and icing options, you can let your creativity run wild. My neighbor, Karen, even added sprinkles, and her kids couldn’t get enough!
– No Unique Skills Required: If you can pipe icing, you can make these cookies. No fancy baking skills needed!
– Show-Stopping Presentation: These cookies are sure to be the highlight of the dessert table. When my daughter, Emma, saw them, she squealed with delight—pure magic!
Essential Components
To create these enchanting treats, you’ll need a few key ingredients that work together to deliver flavor and fun.
– Favorite Cake Mix: Whether you go for a classic chocolate cake mix or Wilton’s Chocolate Cake Recipe, this is the base that holds the magic. It creates a soft, cake-like topping on each cone.
– Chocolate Cookies: Store-bought chocolate cookies or Wilton’s homemade recipe—either way, they serve as the sturdy foundation for your witch hats, providing that rich, chocolatey bite.
– Food Colorings: A mix of colors like lemon yellow, black, rose, violet, golden yellow, and orange brings your witch hats to life. These vibrant hues are what transform the cookies into festive delights.
– Sugar Cones: The fun shape of sugar cones makes the perfect witch hat, and they add a delightful crunch to each bite. Plus, who doesn’t love a good ice cream cone?
– Creamy White Decorator Icing: This generous tub of icing is your canvas. Its creamy texture allows for smooth piping and decorating, making every hat look picture-perfect.
Note: You’ll find the complete list of ingredients, along with their exact measurements, in the printable recipe card at the bottom of this post.
Creating Witch Hat Cookie Magic
Ready to create some pumpkin-spiced magic? Let’s get started on making these adorable cookies!
1. Prepare & Bake the Cones
First things first, follow the instructions on your chosen cake mix to prepare the batter. Place the Cupcake Cones Baking Rack on a cookie sheet and insert sugar cones. Fill each cone with about 2 tablespoons of batter, and then bake according to your cake mix’s timing instructions. Once they’re done, let them cool completely—this is essential for the next steps!
2. Spray the Cones
If your cones have risen a bit too much, trim the tops gently with a knife. Now comes the fun part—use Black Color Mist to spray the cones black, giving them that spooky witch hat feel. Let them dry on some parchment paper for about 10 to 15 minutes. The smell of chocolate and the sight of black cones will definitely set the Halloween mood!
3. Tint the Icing & Prepare the Bags
Next, it’s icing time! Tint 1 cup of creamy white decorator icing orange and another cup purple (combine violet and rose to achieve that vibrant hue). Place each in a decorating bag with tip 2B. Also, tint ¼ cup of icing yellow using golden and lemon yellow, and place that in a decorator bag with tip 3 attached. This is where your creativity can really shine!
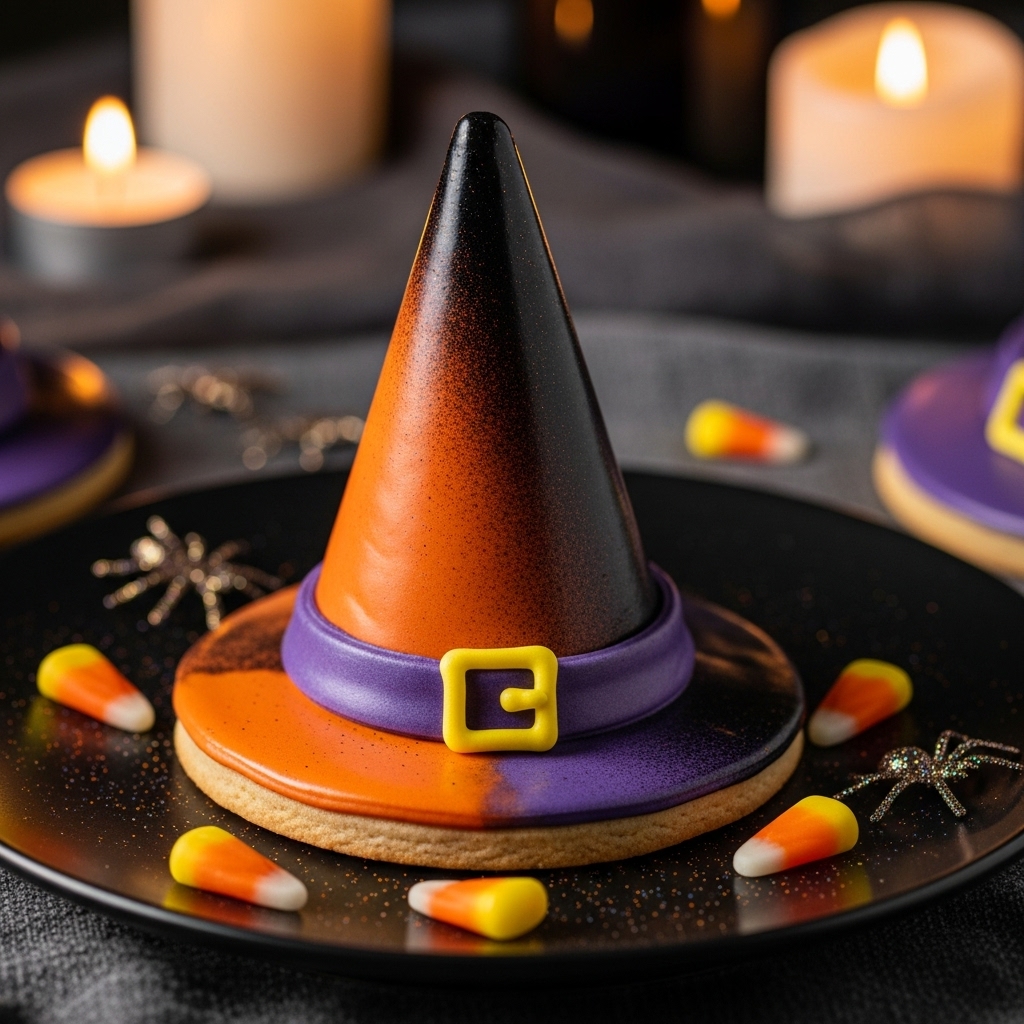
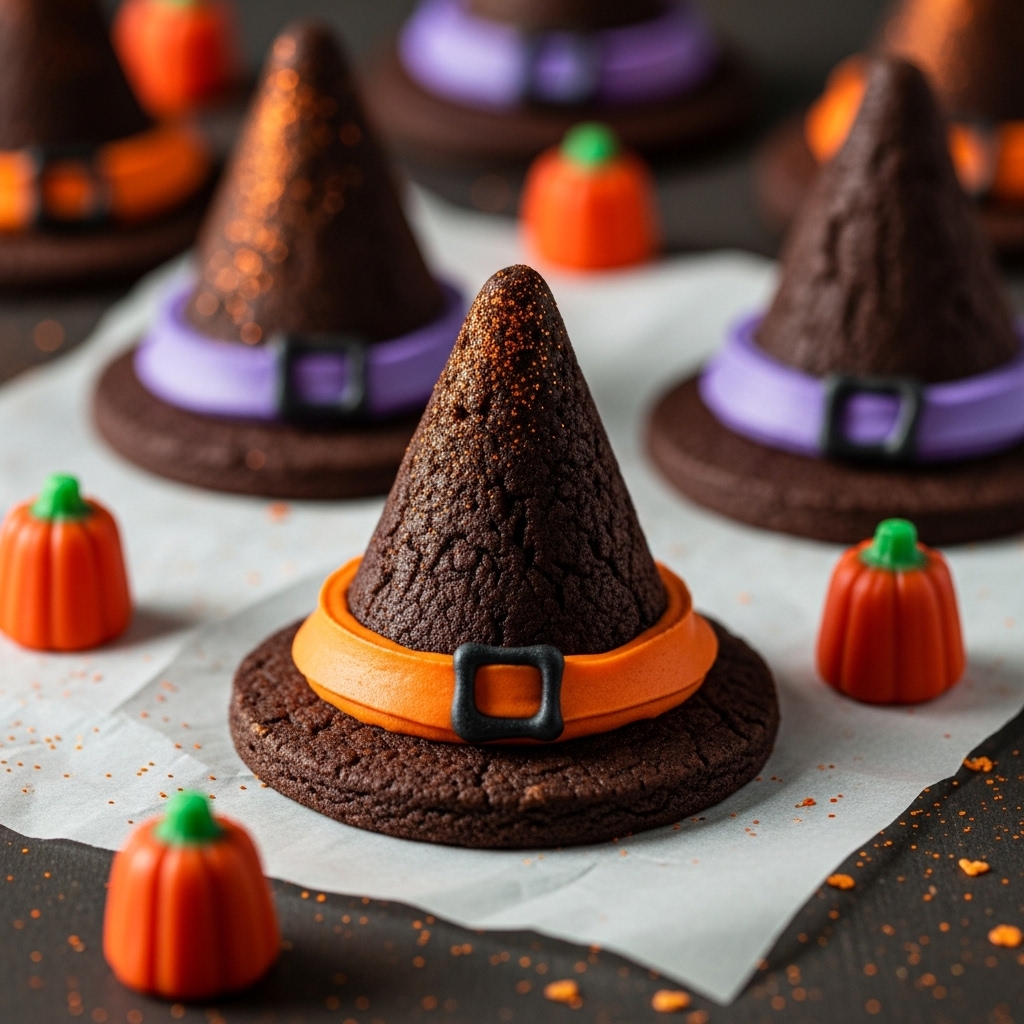
4. Assemble the Witch Hats
Now for the pièce de résistance! Pipe a small dollop of orange icing in the middle of a chocolate cookie and place a cone on top. With the wide end of the cone facing up, pipe a band of icing around it and smooth with a spatula. Repeat the same steps for the purple icing and half the cookies. Finally, use the yellow icing to pipe a little buckle around the band of hats. Let them set for another 15 to 20 minutes before indulging in these beautiful creations.
Insights & Why It Works
The brilliance of these Witch Hat Cookies lies in their playful approach to dessert. By using cake mix and sugar cones, you leverage convenience without sacrificing creativity or taste. The cake mix provides a soft, rich topping that pairs perfectly with the crunchy cone, creating a delightful contrast in texture.
The colorings, too, aren’t just for decoration; they ignite excitement and spark joy—not just for the kids but for the grown-ups too! I’ve found that the more colorful the dessert, the more it brings everyone together. My friend Lisa even mentioned how these cookies inspired her to host a Halloween baking party!
One key “aha!” moment I had while perfecting this recipe was realizing that letting the cones cool completely was crucial. It prevents the icing from melting into a gooey mess!
Perfect Halloween Presentation
To make your dessert table extra special, consider serving these cookies on a black or orange platter for that festive flair. Add some spooky decorations around them, like fake spiders or cobwebs, to enhance the Halloween vibe. A small bowl of assorted candies can also accompany these treats for an even sweeter display!
Creative Variations
These cookies are so adaptable! Here are a few fun variations you might enjoy:
1. Different Cone Shapes: Try using waffle cones for a different look and texture.
2. Flavor Infusions: Experiment with different cake mix flavors, like red velvet or spice cake, for a delicious twist.
3. Sprinkles Galore: Add colorful sprinkles or edible glitter as an extra layer of fun on the icing!
4. Themed Icing Colors: Have a costume party? Match your icing to your costumes for a cohesive theme!
5. Chocolate Drizzle: Drizzle melted chocolate on top for an extra decadent touch.
Make-Ahead Magic
The beauty of these cookies is that you can prepare many components in advance! Bake the cones the day before and store them in an airtight container to keep them fresh. You can also tint your icing a day ahead; just seal it in a bag and store it in the fridge. This allows you to assemble everything the day of your party with minimal stress!
Halloween Cookie Success Tips
– Don’t Overbake: Keep an eye on the cones while they bake to maintain that perfect soft texture.
– Cool Completely: Make sure the cones are fully cooled before adding icing—this prevents melting.
– Piping Practice: If you’re new to piping, practice on a piece of parchment paper first to build confidence.
– Seal Well: Store any leftover cookies in an airtight container to keep them fresh for days—if they last that long!
Final Thoughts
As the final decorations went up in our home that Halloween, I took a moment to breathe and soak in the excitement. With these enchanting Witch Hat Cookies, I felt like a true Halloween wizard, ready to delight the little monsters who would soon come knocking. They saved me from the chaos of party prep and allowed me to relish in the joy of being a present parent.
So as you gear up for your Halloween gatherings, remember that these cookies are your secret weapon to easy, stress-free entertaining. They’ll not only impress your guests but also create lasting memories for you and your loved ones. Magic awaits in your kitchen—so grab those ingredients and let the fun begin!
Frequently Asked Questions
Can I make these the night before?
Absolutely! You can bake the cones and prepare the icing the day before. Just assemble them the morning of your gathering for maximum freshness.
How do I prevent the icing from melting?
Make sure to let the cones cool completely before piping the icing on. If the cones are warm, the icing may melt!
Can I use different food colors?
Definitely! Feel free to use any colors that fit your Halloween theme—get creative!
What’s the difference between using cake mix and a homemade cake recipe?
Using cake mix saves time, but a homemade cake recipe will allow for more flavor customization. Choose whichever suits your schedule and preferences!
How do I store leftover cookies?
Store any leftover cookies in an airtight container at room temperature. They should stay fresh for a few days—but they might not last that long with all the deliciousness!