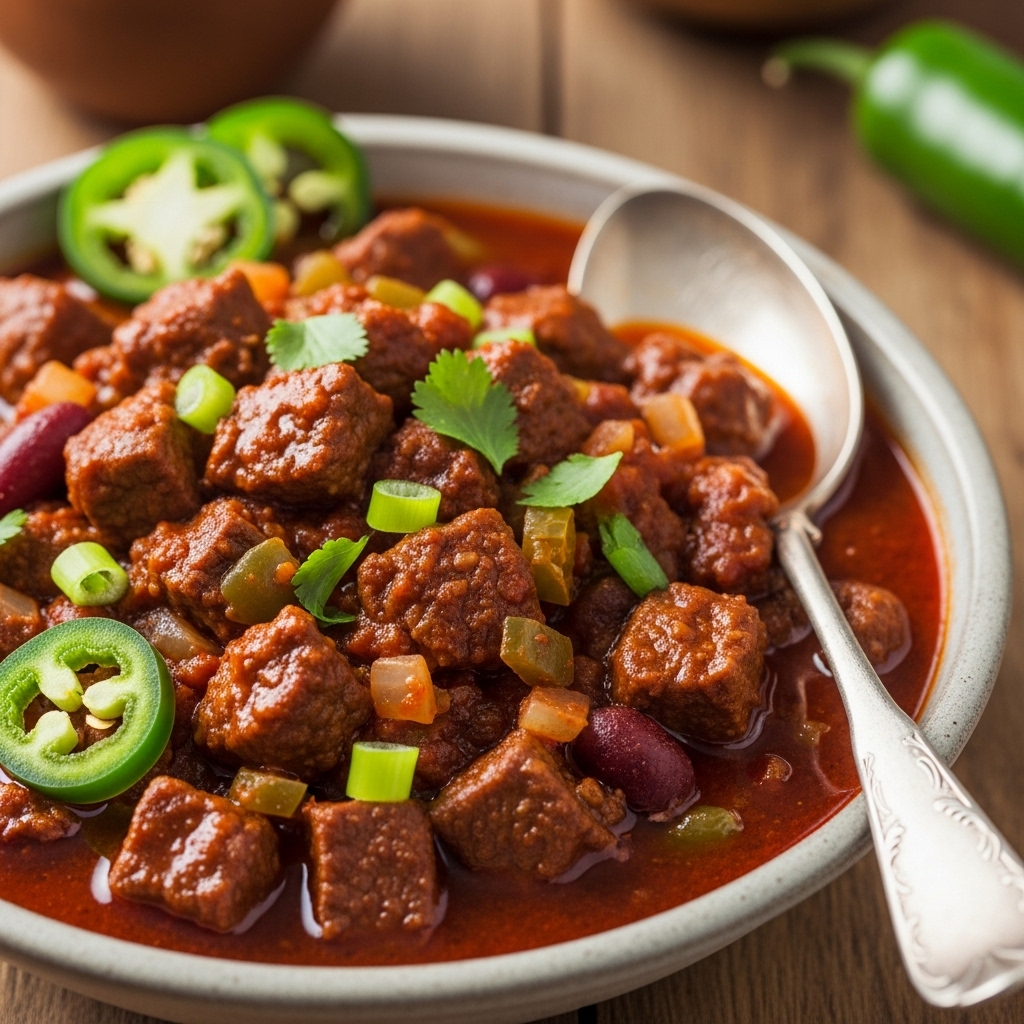
Texas Chili Recipe
The Ultimate Solution for Cozy Gatherings: Authentic Texas Chili (No Beans, Just Flavor!)
When I think back to my first attempt at hosting a cozy gathering, I can’t help but smile and cringe in equal measure. Picture this: a chilly evening, my living room filled with friends, laughter echoing, and me in the kitchen, anxiously stirring a pot of pasta that just wouldn’t get al dente. It was a recipe for disaster, and let’s just say, a meal that fell flat. Enter my dear friend Mark, a Texas native, who casually strolled in and offered to whip up his famous Texas chili. The moment that rich, smoky aroma wafted through my home, I knew I had to learn his ways.
Fast forward to today, and Texas chili has become my go-to solution for gatherings, effortlessly warming both bellies and hearts. This authentic, meaty chili is not just a dish; it’s a breakthrough that transforms any event into a cozy celebration. It’s the dish that allows you to actually enjoy your own party—no more hiding in the kitchen while the fun happens around you!
Why This Texas Chili is Flavor Gold
– No Beans, Just Beef: This traditional chili recipe delivers a hearty, satisfying experience without the distraction of beans. Every bite is packed with meaty flavor.
– Bold and Smoky: The blend of ancho, pasilla, and New Mexican peppers creates a depth of flavor that will have your guests asking for seconds (or thirds!).
– Make-Ahead Masterpiece: You can prepare this chili ahead of time, allowing the flavors to meld beautifully, making your hosting duties a breeze.
– Versatile Serving Options: Serve it with cornbread, over rice, or as a topping for baked potatoes—the possibilities are endless!
– Crowd-Pleaser: I once brought this chili to a potluck, and it disappeared faster than I could say “Texas.” My friend Lisa still raves about it and often asks if I’ll make it for our next get-together.
Essential Components
The star of the show is, of course, the ingredients. Each one plays a crucial role in creating that unforgettable taste.
– Dried Peppers (Ancho, Pasilla, New Mexican): These dried beauties add layers of flavor, bringing both heat and smokiness to your chili. Toasting them releases their essential oils, amplifying their deliciousness.
– Beef Chuck: Choosing beef chuck ensures a tender, rich texture as it cooks down, melding perfectly with the spices and peppers.
– Cumin: This spice is the backbone of the chili, adding warmth and an earthy note that balances the heat from the peppers.
– Onions and Garlic: These aromatics are essential for building the foundational flavor right at the start.
– Masa Harina: This corn flour is the secret weapon for thickening the chili to perfection, giving it that hearty, comforting texture.
Note: You’ll find the complete list of ingredients, along with their exact measurements, in the printable recipe card at the bottom of this post.
Creating Texas Chili Magic
Now, let’s dive into the cooking process—this is where the magic happens!
1. Toast the Dried Peppers: Start by heating a dry skillet over medium heat. Toss in the dried peppers and toast them for about 1-2 minutes on each side until fragrant. This little step releases their oils and enhances their flavor.
2. Prepare the Peppers: Once toasted, let them cool enough to handle. Remove the stems and seeds (you can save some seeds if you want extra heat) and toss them into a bowl of hot water. Let them soak for about 20 minutes until they’re soft and pliable.
3. Blend the Chili Paste: Drain the peppers and transfer them to a food processor. Add about ½ to 1 cup of the soaking water and a pinch of salt. Blend until you have a smooth paste and set aside for later.
4. Season the Beef: In a large bowl, toss the cubed beef with cumin, salt, and pepper until every piece is well-coated. This will ensure that your meat is flavorful right from the start.
5. Sear the Beef: Heat a tablespoon of olive oil in a heavy pot over medium-high heat. Add the seasoned beef and sear it for about 6-7 minutes until it’s brown all over. Remove the beef and set it aside—this step builds great flavor!
6. Sauté the Aromatics: In the same pot, add the remaining olive oil, then toss in the chopped onions, jalapeños, and serranos. Sauté for about 5 minutes until they soften, releasing their sweet and spicy aroma. Add the garlic and continue to cook for another minute.
7. Combine Everything: Return the beef to the pot and stir in the reserved chili paste. Let it cook for another 2-3 minutes to develop the flavors.
8. Add the Liquid: Pour in the beef stock (or beer if you’re feeling adventurous!), along with 2 cups of water, brown sugar, Worcestershire sauce, and masa harina. Bring it to a quick boil—this is where the magic really starts!
9. Simmer to Perfection: Reduce the heat, cover, and let your chili simmer for about 2 hours. Stir it every 30 minutes, and if it gets too thick, add a splash more water. The beef should be fork-tender when it’s done.
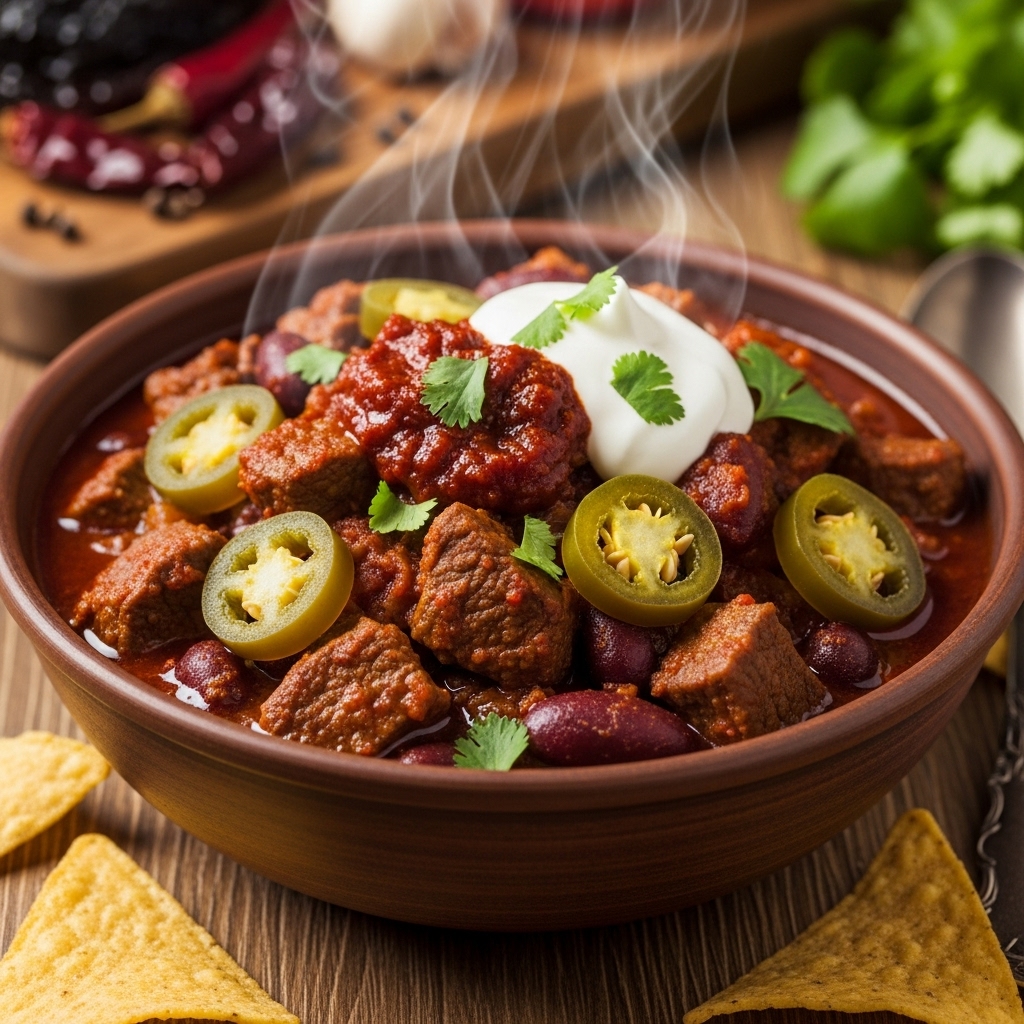
10. Serve It Up: Ladle the chili into bowls and serve with your favorite toppings. Trust me; it’s even better the next day!
Insights & Why It Works
The brilliance of this Texas chili lies not just in its rich flavors but in the simplicity of preparation. Toasting and blending the dried peppers might seem like a chore, but it transforms the chili into a vibrant, smoky delight, elevating it from ordinary to extraordinary. This technique allows the flavors to meld beautifully, creating a rich base that suggests hours of cooking, all in a single pot.
The beef chuck’s tender texture after slow cooking ensures that each bite offers a burst of flavor, while the masa harina thickens the chili just enough to make it satisfying without feeling heavy. I’ve found that the key is to let it simmer long enough for the flavors to really marry—an “aha!” moment I learned the hard way after a few too-quick batches.
As for serving, this chili is a canvas for creativity! Pair it with cornbread or tortilla chips for a delightful crunch. And for those who love a kick, a dollop of sour cream or a sprinkle of fresh cilantro makes all the difference.
Perfect Cozy Gathering Presentation
Dress up your Texas chili experience with a few thoughtful touches. Serve in rustic bowls topped with shredded cheese and chopped green onions for that inviting, homey feel. A side of warm cornbread adds a delightful sweetness that perfectly balances the chili’s spice. Consider setting up a toppings bar with options like diced avocados, jalapeños, and a variety of hot sauces, allowing friends to customize their bowls to their liking. You’ll have them raving about your hosting skills in no time!
Creative Variations
While this recipe is delicious as is, it’s also incredibly adaptable. Here are a few variations to inspire your creativity:
– Vegetable Chili: Substitute the beef with a hearty mix of roasted vegetables like bell peppers, zucchini, and mushrooms for a satisfying vegetarian option.
– Spicy Sausage Add-In: For an extra kick, add in some spicy sausage or chorizo along with the beef for a depth of flavor.
– Beer Infusion: Swap out the beef broth for your favorite stout beer to enhance the smokiness and richness of the chili.
– Different Peppers: Experiment with other dried peppers like chipotle for smokiness or guajillo for a different flavor profile.
– Slow Cooker Version: If you prefer a slow cooker, throw everything in after sautéing the aromatics and let it cook on low for 6-8 hours.
Make-Ahead Magic
One of the best parts about this Texas chili is how well it lends itself to prep ahead of time. You can prepare the chili up to the point of simmering, then let it cool completely before transferring it to an airtight container. It can be stored in the fridge for up to three days or frozen for up to three months. On the day of your gathering, simply reheat it on the stove, adding a splash of water if it thickens too much. This way, you can kick back and enjoy the company of your guests without stressing about dinner!
Texas Chili Success Tips
– Don’t Rush the Toasting: Take your time to toast the dried peppers; it’s worth the extra minute for that deep flavor.
– Cut Uniformly: Make sure to cut your beef into uniform cubes for even cooking.
– Keep on Simmering: The longer you let it simmer, the better it tastes. Plan for at least two hours if you can.
– Taste as You Go: Adjust the seasoning as needed, especially towards the end of cooking. Your taste buds are the best guide!
Final Thoughts
Hosting doesn’t have to be overwhelming, and this Texas chili proves that. By preparing this hearty dish filled with rich flavors, you’ll not only satisfy your guests but also take a step back to enjoy the laughter and stories shared around the table. It’s the perfect antidote to my early hosting fiascos, allowing you to shine as the effortless host. So, gather your friends, pour yourself a glass of wine, and let the comforting aroma of Texas chili fill your home. You’ve got this!
Frequently Asked Questions
Can I make this Texas chili the night before?
Absolutely! In fact, letting it sit overnight allows the flavors to deepen. Just reheat it gently before serving.
How do I prevent my chili from being too thick?
If your chili becomes too thick during cooking, simply add a splash of water or broth and stir until you reach your desired consistency.
Can I use different peppers?
Yes! Feel free to experiment with other dried peppers like chipotle for smokiness, or guajillo for a different flavor profile.
What’s the difference between dried peppers?
Dried peppers vary in flavor, heat, and aroma. Ancho peppers are sweet and smoky, pasilla peppers are rich and complex, while New Mexican peppers are milder and slightly fruity.
Can I freeze leftover chili?
Definitely! Texas chili freezes well for up to three months. Just make sure to cool it completely before transferring to an airtight container.
Now, grab your aprons, gather your ingredients, and let’s get cooking!